Monday, August 23, 2010

The Gang's All Here - Sesame Street Card

Oh man! Do I love this card!!! I don't even know where to begin. So I'll just jump right in.

As you can see, there are no Cricut cuts on this card. I kinda like that about it. I love my PC products. There's no doubt about that. But I have tons of other products that I love too and I want to use them as well.

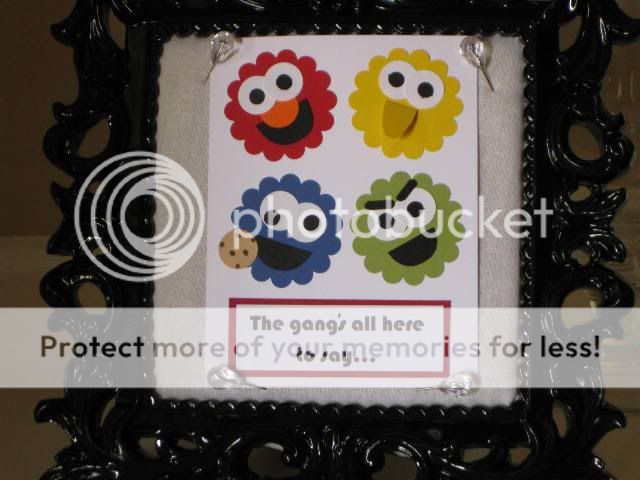
This card was made with the SU! scallopped punch. I used another dollar bin punch for the whites of the eyes and a hand punch for the blacks of the eyes.


I used the same dollar punch for the nose on Elmo and the cookie for Cookie Monster. I added the chocolate chips with a brown marker.

I free hand cut all the mouths, including Big Bird's beak. I also cut a small piece of pink to put on the inside of the beak for the tongue.

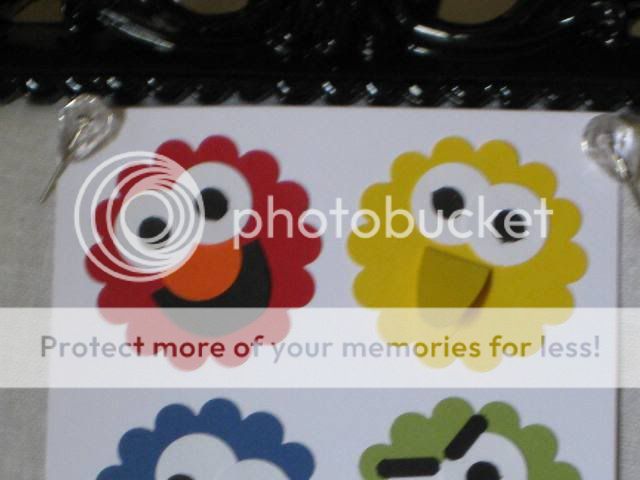
I cut or punched Oscar's eyebrows to make him look mean and upset (it worked, don't you think!).

I printed the outside and inside sentiments on the computer, matted them and glued them on to the card. I think I will print the inside on the card next time. I glued all the faces on the card as well as the sentiments and it was complete. I just love this card and I am so proud of using something for more that one use. I hope you love it and leave me lots of blog love!

Smooches,

Thursday, August 19, 2010

Found a New Blog I Love!

I love my Cricut and my Gypsy! I know a lot about the products, carts and I create most of my projects with them. But I don't know too much more about Provo Craft and the Cricut designers.

But today I ran across the blog of Joy, one of the project designers for Cricut. She creates amazing work and there are tons of resources on her blog. When you need inspiration, give her blog a try!

Obsessed with Scrapbooking


Smoochesm

Robin
The Scrappin' Delta Diva

Monday, August 16, 2010

30 Minute Card - Gather Friends

I love this card! Although, I must tell you that this is not what I set out to make. Sometimes, when I am crafting, my projects take on a life of their own. It is a real organic experience. That's exactly what happened here.

I had gotten a new toy and set out out to use it. By the time I started pulling my ideas together along with my supplies, the new toy was no where in sight. I put the card together and I was glad I trusted my creative spirit.

This card is not about the cuts and it did not take a lot of designing. The beauty in this card is in the techniques and embellishments that were used. It took about 30 minutes from start to finish and you can make one in that amount of time too!

Here are the details.

Cart:
  • Gypsy Wanderings - leaf

I cut the brown layer 3.75" x 5.25" and embossed it with the Script embossing folder. I then cut orange layer 3.5" x 5" and embossed it with the Tim Holtz Woodgrain embossing folder. I cut the leaf at 2.5" and inked the edges with the TH Distress inks in Fired Brick and Peeled Paint. I really love the way the leaf came out . The distressing makes it come to life.


I printed the sentiment on the computer in brown ink and inked the edges with the same inks I used on the leaf. I glued the 2 background layers down. I put pop dots on the leaf and the sentiment to raise them up and give more dimension.

When I finished this card, it made me want to put a warm sweater on, pull all my friends close and just talk for hours. What about you? Tell me what you think by leaving me some comments and blog love! TFL!!!


Smooches,


Thursday, August 12, 2010

Beautiful Crystal Chandelier Card

I am not an outwardly sassy, flirty girl. But I can be when I want to be! I do love a little pink and leopard print every now and then. I saw this paper and it made feel a little sassy and that was the inspiration for this card!

I love beautiful things and I have seen some very pretty colored crystal chandeliers lately. I have always wanted to make a card with a chandelier so this was the perfect opportunity. Here are the details.

Cart:
  • Home Decor - chandelier and sentiment

I cut the chandelier and the blackout at 3.4" x 3.12". I cut the sentiment at 3.59" x 1.24"


Once the pink chandelier was cut, I covered it with JudiKins Diamond Glaze. It is a water-based, dimensional adhesive. When the entire chandelier was covered, I dusted it Diamond Dust. This is finely ground glass that makes a beautiful affect.

Once the chandelier was dry, I began to assemble the card. I glued the background down. Then I glued the blackout of the chandelier in place. I glued the blackout of the sentiment in place and placed the sentiment on top. I used a piece of bling for the dot on the letter "i". I put pop dots on the "crystal" chandelier and put it on the card.

I hope you like it! Thanks so much for looking and leave me some comments and blog love!

Smooches,

Wednesday, August 11, 2010

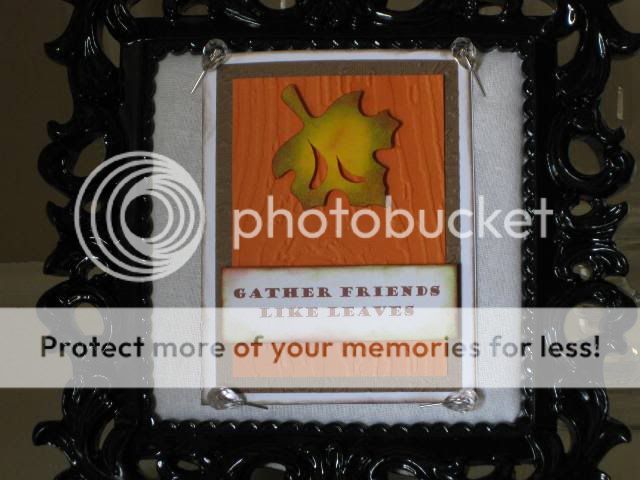
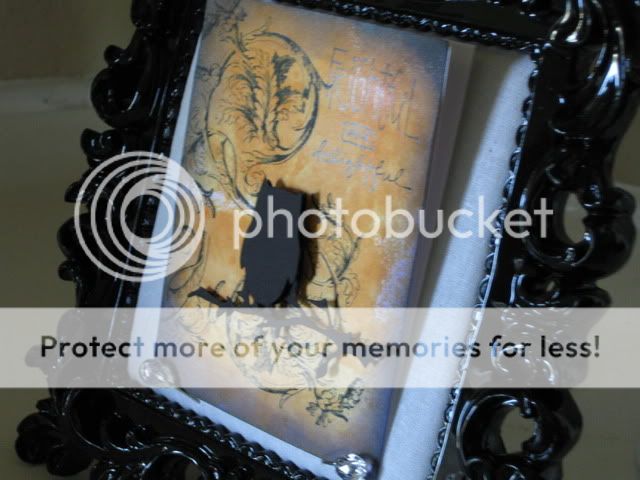
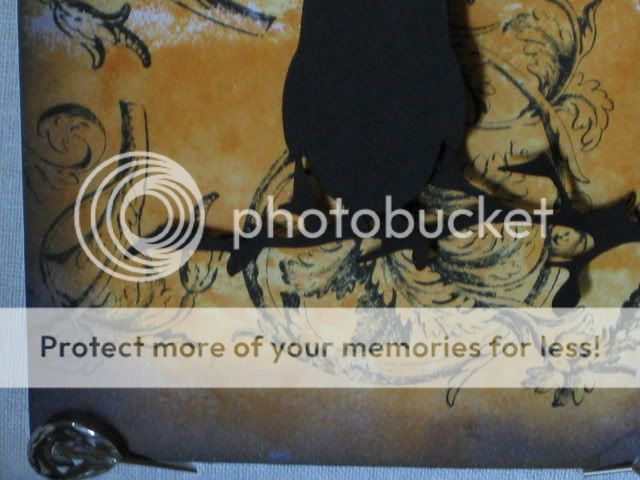
Living in Texas, it is still hot as the dickens here. Nonetheless, I am getting in the mood for Fall. Here's my first Halloween card. I used my Tim Holtz inks on this one. I just might be a little dangerous with these things after my class with Tim himself on August 28th!

Here are the details for this card.

Carts:
  • Gypsy Wanderings - branch
  • Sugar and Spice Lite - owl

I used a technique I learned from watching the demo videos on Tim's website. I swiped the Spiced Marmalade ink pad on a craft mat, sparyed it with water and dapped my paper in it. I then dried it with my heat gun and repeated the steps one more tiime. I then inked the edges with my the foam applicator and the Dusty Concord and Black Soot inks. I love that purple and orange combination.


I stamped the sentiment with a dollar stamp using the Black Soot ink pad. I went over the sentiment with Perfect Pearls in Perfect Pearl (white).


I used an old Anna Griffin stamp I forgot I had to make the scroll print in the background. I welded the owl and the branch together on my G. The owl was actually a lot fatter but I streched him out to give him a spookier look. I cut a seperate owl to lift up with pop dots. It's all about the shadows for a halloween card!


I put pop dots behind the branch and adhereed it all to the background. I am really happy with this card, especially knowing when I make it again, it won't be exactly the same. Thanks for looking!


Smooches,


Sunday, August 8, 2010

Bonjour to French Manor

Call me crazy but I have almost forgotten how to use my E since I rely so heavily on my G now! Do any of you feel that way too? It is because of this reason that I am just now really getting into my French Manor cart. I have loved it since I first saw it but I couldn't get my cuts to come out like I wanted them to. But now that it is on the G, I can design until my hearts content!

I saw a card that Jeannie Philips made this week with the FM cart and I liked it (as I always do with her creations). What's funny is that I had just bought some paper this week in very similar tones and had planned to make a card like this one. Great minds think alike!

Here's my first card with the French Manor cart. I just love the way it came out. Every single cut is from the FM cart. I used the stamp frame and welded a flourish to the inside of it for the large cut. I used my Tim Hotlz ink in Black Soot to ink the edges (I like the subtle affect his inks give with the daubber).

I then cut a bird bath and the sentiment. I started to put the sentiment on the card but felt it needed something to help it pop. So I took a piece of scrap paper, cut it and rounded the corners and made it a plaque for the sentiment. I put small pop dots on all the parts and adhered them to the card.

I hope you like it as much as I do. Leave me some blog love and comments. Until next time...


Smooches!

Monday, August 2, 2010

Martha Stewart Punches Card

Like many of you, I watched the HSN launch of the Martha Stewart Crafts which included the MS Cricut Cake Machine. While I didn't buy a Cricut Cake (I was very tempted though), I did buy a cartridge and a set of punches. I used the punches, called the Spring Collection, to make this card.

Let me just tell you, when I saw them demonstrate the Deep Edge Punch, I was sold! The set included 4 punches, most of which you can find in Michael's but for a much higher price. I contemplated getting them with coupons but it would take me a while to get them all that way. So I bought them and boy am I glad I did.

The Deep Edge Punch does exactly what it's name implies - it cuts deep into the paper for a beautiful edge. I used it to make the white flowers/circles on the card. But the punch only cuts one side. The way to make this beautiful border is to cut a strip of paper 2 1/2" wide and punch one side of the paper. Then you turn the paper over and around and punch the other side starting on your original end. It takes a little practice to line the inital second side punch up perfectly but once you get it, the affect is spectacular!


The second punch I used is the Stamp and Punch in the butterfly. This punch comes with 3 coordinating butterfly detail stamps in a little compartment on top of the punch. You can use those to punch different designs on cardstock. Then you take your punch, line it up with our stamped image and punch out your design. This is really an ingenious tool in the flexibility that it gives you. I really like this punch a lot. I punched out 5 butterflies, glueing some to the paper completely while others I lifted up the wings.

The last thing I did was cut the sentiment out with the MS Elegant Cake Art Cart. I really love this cart. Once cut, I glittered them with the MS Fine Glitter in Onyx and glued it down on the card.

I wasn't quite sure how this card was going to come together but I am pleased as punch with the final result. Thanks for looking, leave me some love and be blessed!

Smooches!

Robin
The Scrappin' Delta Diva