Showing posts with label Halloween. Show all posts

Sunday, October 14, 2012

Halloween Wreath

Hello crafty peeps!  I hope this post finds you enjoying some beautiful Fall weather.  Today, I am sharing with you all a Halloween Wreath that I made for my door.  I got the idea off of Pintrest (my newest addiction!).  I have been pinning for almost a year now and I can't get enough, espeically when I get inspiration like this!  Here is my version of the wreath.


Materials and Supplies
  • Foam circle (any size would work; this one is 14 in)
  • Black yarn
  • White Yarn
  • Halloween Picks (leaves, skull, raven, flowers, etc.)
What drew my attention to this wreath was the contrasting black and white sections of the wreath.  Because I wanted my alternating colored sections to be even (or close to it), I took the time to measure out sections and mark them on the foam wreath.  I first divided the wreath into 4 even sections.  Then I decided to I wanted there to be 3 smaller sections in each quadrant.  I drew lines on the foam with a sharpie marker and started wrapping the yarn. 

*Tip - when it got close to time for me to start wrapping the next color, I would get the starter end of the new yard and secure it underneath the old yarn as I wrapped it to the sharper line.  I would then cut a little extra of old yarn and secure it underneath the new yarn as I started wrapping it.  This kept me from having to knot the yarn and kept my wreath smooth.


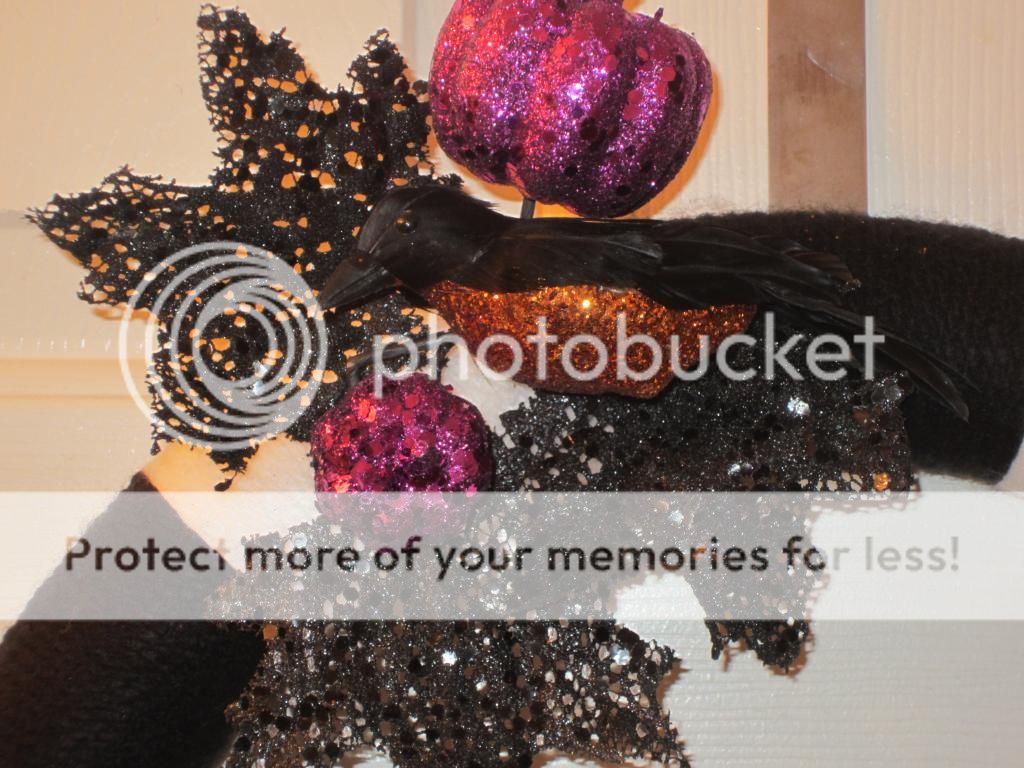
Once this was complete, I started deciding where to put my pics.  I knew that I wanted the alternating black and white pattern to show so I went with a "Less is More" kinda placement. First in was the black leaves and pumpkins (these were all on one pick).  I fanned them out knowing other stuff was going on top of them.  I started out this project thinking I was going to use the Coffee Filter Flowers that I saw Teresa Collins make on My Craft Channel (click here to watch video).  I stamped the filters and they where well on their way to what I wanted them to be.  But I decided to spray them with orange mist and that made the already thin coffee filters very flimsy.  I didn't think they would stand up to the weather outside so I scrapped them and decided to go with some large fake orange peonies.  I love the rich color these bring to the wreath.  I then added the huge sparkly purple skull and I was giddy!


I like Halloween stuff that is erie but not over-the-top gorie or scary.  So the black and orange raven at the pick that I found was exactly the kind of thing I was looking for.  I carried the purple to the top with the pumkins and added some more black leaves. 

I am very pleased with how my wreath came together.  My door is ready for the season - now I just need to get the rest of house there!

Check me out on Pinterest.  You can find me under Deltascrapper or Robin Clark.  I have lots of boards with great stuff like food, crafty goodness and funn stuff.  you can find the inspiration for this wreath on my Fall and Halloween board.  Until next time...


Smooches!

Robin

Friday, September 30, 2011

What's Cooking? Halloween Card + CC Challenge Entry


I swore off entering challenges a while ago. I had worked really hard on a couple of projects and I didn't win. I don't take rejection well so I have found out lately. But in an effort to grow and mature, I decided to give the challenges on the CC Blog another stab. Here is my entry for the September Monthly Challenge which was to include a window element.


Carts and Materials
  • Happy Hauntings -
  • October 31st
  • Ink - TH Black Soot, SU Craft White
  • Stash - plain cardstock, twine


I started by making a 6x6 card base and distressing it with black ink.  I think it adds to the spookiness.  I then cut the window frame at 5.80".  I justed the Hide feature on my Gypsy to make the gray window frame base which allowed me to hide some of the cut out details.  I tapped the edges of the black window frame with white craft ink to age it a little.  I really like this affect.  I added a piece of white vellum to the window to give the shadow affect.


I cut a spider web ont of gray paper which did not cut as well as I would have liked.  But I used this to my advantage because it makes the web look like it has been there while.  I cut several spiders and decided on this guy which I "suspended" on black and white twine.


I cut two mice and used pop dots on the second one to give it a little dimension.  Isn't he cute?!  The witch in the background is actually the Bride of Frankenstine cut but I added a hat on and a pointy nose to her to turn her into a witch.  I think she looks great stirring the concoction she is making in her caludron.
This time, I carried my theme to the inside of the card with my sentiment.  I used the font on the Happy Hauntings cart and welded the letters together on my G.  I added another caludon and a hand coming out of it.  So cute!


I hope you like my entry for the contest.  I know I do.  And for those of you who are wondering where I got the ornaments, I found them at Ross.  There was only one pack or else I would have gotten more.  I may be on the hunt this weekend!  Leave me some blog love and I will talk to you soon!


Smooches!


Saturday, September 24, 2011

Witch's Boot Altered Wood Cutout

Hello to all my peeps out there in bloggerville!  I have a project for you today working with a raw wood cutout.  I haven't done many projects with this medium but I am fast falling in love with it.  I turned this...


into this!


Deets please!

Carts and Materials
  • Indie Art - skull and crossbones
  • Paper - Authentique "Glowing"
  • Paint - Martha Stewart "Beetle Black"
  • Glitter - Marth Stewart "Fire Opal"
  • Spray - Glimmer Mist "Graphite"
  • Ink - SU Basic Black, TH Spiced Marmalade
  • My Stash - black roses, black swirl bling, twine, crepe streamer, black ribbon trim

I attended the Cricut Stampede last Spring and we each received this wood cut out of a cowboy boot.  It has been sitting on a shelf in my craft room since I came home.  Halloween usually shows a lot of witch's boots so I knew I had found an opportunity to use my cut out.  I started by painting it black with some new paint from MS that I found at Michael's.  I then covered it with this beautiful Halloween paper from Authentique. 

I adeded some crepe paper ruffles to the edge of the boot which makes the boot very girly.  I covered up my glue line with a piece of black trim.  Things were going in the right direction.

I used 2 different papers and I wanted to stress that detail.  So I added a line of glitter to make the transition more noticable.  now, it's time for the little details.

I am learning to layer in details instead of feeling like everything I put in a project has to be immediatley seen at first glance.  I am still working on this but I feel I did a good job here.  I added some black swirl bling and layered a skull and crossbone cut on top.  I covered the cut with Glimmer Mist in Graphite.  I love the splattered look.  I edged it with Spiced Marmalade ink.  I plopped several loops of twine and some black roses at the beginning of the bling to complete the look.

I added another black swirl of crystals complete with a cluster of roses.  I also added a few orange diamonoids to finish the look.


I edged the entire boot with Basic Black ink to give it more of an aged look.  Do you love my kickin' witche's boot?  I sure do!  With boots like these, anyone could get into a little trouble!  Until next time...

Smooches!