Sunday, August 21, 2011

August 2011 Card Swap Card - Friendship

I have been absent from my blog for a couple of weeks now and for good reason.  I got a promotion last Spring to Special Ed Department Chair at my high school and the position has kept me busy!  I almost brought a cot up there and just spent the night since I was leaving the school most nights betweeen 8 and 10 pm. 

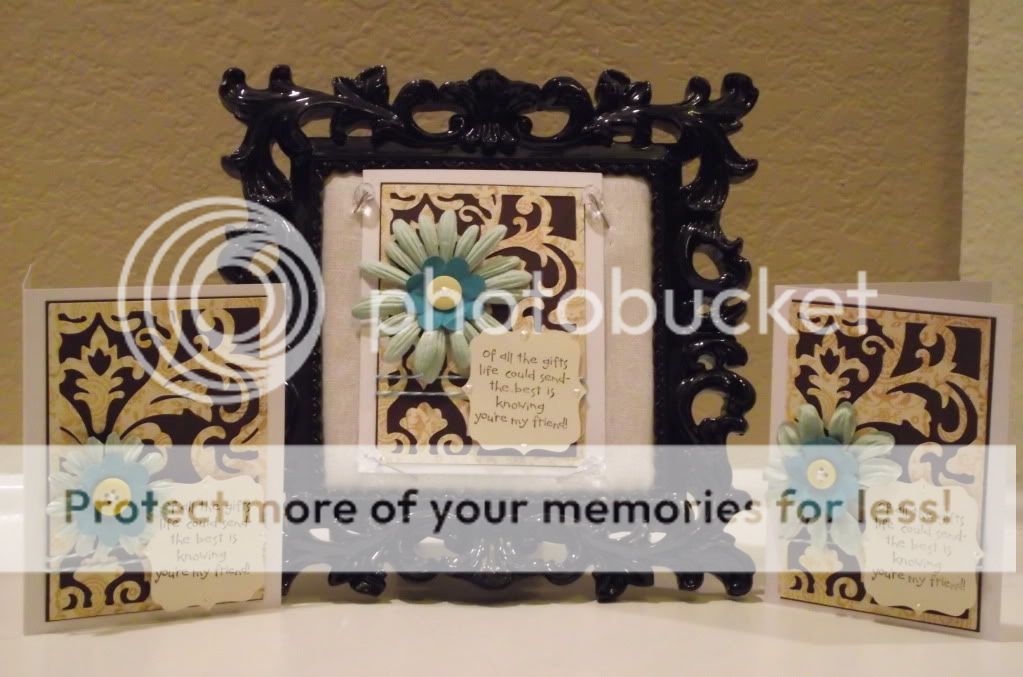
I signed up for a year long card swap that started in August and somehow, someway (probably with 1 eye open), I finished my August card on time.  Here it is.  Each month has a theme and this month's theme was friendship.


Carts and Materials
  • Damask Decor - background (using the Card feature), flower
  • Storybook - panel
  • Paper - Authntique
  • Stamp - StampinUp!
  • Pearl Accents - Pearl Pen (love this thing) in pearl
  • Spray - Glimmer Mist in Gumdrop
  • My Stash - buttons, twine and flowers
I had to make 14 cards for this swap.  I had gotten a new cart and I wanted to use it so that's how I came up with the background.


I had just purchased some of the new Authentique papers and knew I wanted to use those on my cards.  I also like cards that have a lot of texture and dimension so I came up with the idean to add twine, buttons, and flowers.  I used my Pearl Pen to add a little accent in the middle of the button.  I also sprayed the flowers with Glimmer Mist for a little more depth.  It has gold glitter in it.


I stamped the sentiment on the panel with chocolate chip ink from StampinUp!.  I added some pearl accents to the points with my Pearl Pen, adhered it with pop-dots and the card was done.


Good news is - I'm done.  The better news is that there will be a new card each month so make sure you check back often to see next month's creations.  As always, leave me some love and I will see you all next time.  Wish me luck on my new school year which starts tomorrow and send up some prayers!

Smooches,

Thursday, August 4, 2011

Cartridge Spotlight Week - Plantin Schoolbook: Gift Tubes

Hey everybody! It's been a crazy busy week but I am back with the second project in this weeks Cartridge Spotlight. As you know, this weeks cartridge is Plantin Schoolbook. I was able to make this project with only cuts from this cart. So let's get to the project which is....Gift Tubes!


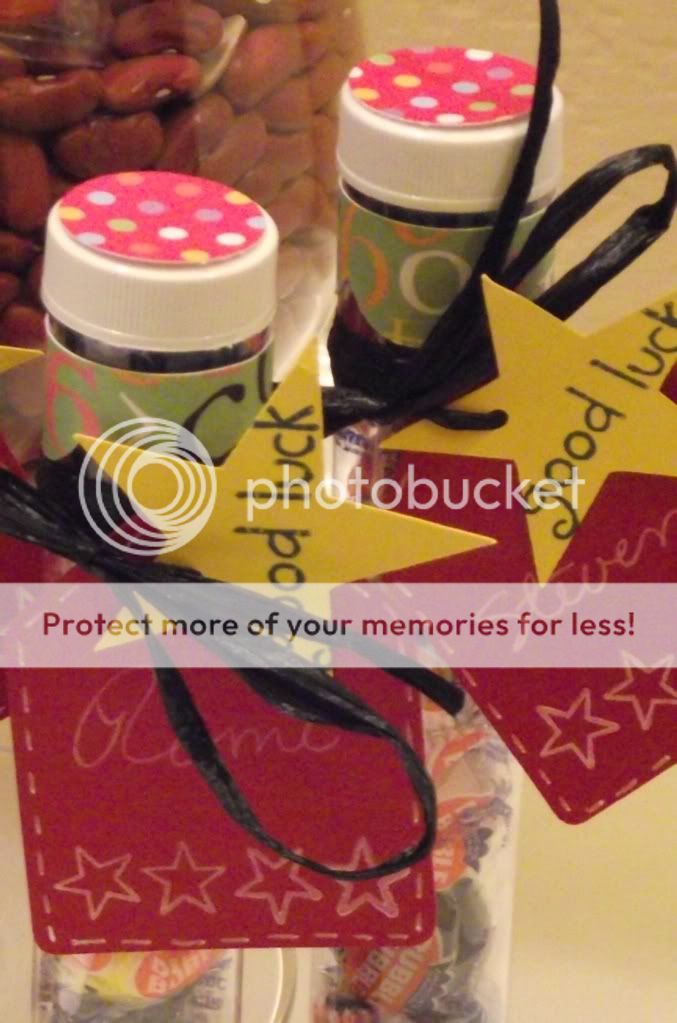
As many of you know, I am a teacher. I was promoted at the end of last school year to Special Education Department Chair at my high school. So I decided to make these tubes for my team to welcome them back this year.

I used the Grade School paper pack from DCWV again and some plain cardstock from my stash as well. I cut a scalloped border and glued that around the top. I also cut a tag and a star to put the names and sentiments on.

I stamped some stars and the sentiment using Stampin Up! inks and some stamps I found in the dollar bin. I also used my white gel pen to put some ticking around the edge of the tag. I tied them on to the tubes with raffia and glued a 1" circle to the tops of the tubes.

I forgot to say I filled the tubes with Dubble Bubble bubble gum. I hope my team likes these and that it gets them off to a great start to the year.

Leave me some love and remember to check back for at least 1 more project this week. Toodles!

Smooches,

Monday, August 1, 2011

Cartridge Spotlight- Plantin Schoolbook: Gift Bag

Hi everyone and welcome to my very first Cartridge Spotlight Week!  What is this you may ask?  From time to time, I am going to choose one of the over 250 beloved cartridges made for the Cricut machine and make projects with that cartridge.  I will try very hard to only use the weeks cartridge for all the cuts but I may have to venture out from time to time (don't hold it against me!).

So to start off this feature on my blog, I am starting with the Plantin Schoolbook cart.  Most people have this cart and since school will be starting soon, I thought it was the perfect choice.  Here's what I made!


Materials
  • Paper - Grade School paper pack by DCWV
  • Various Cardstock
  • Ruler Stamp - Maya Road
  • Ink - Stampin' Up! (red, black and white)
  • Various ribbons, buttons and twine from my stash

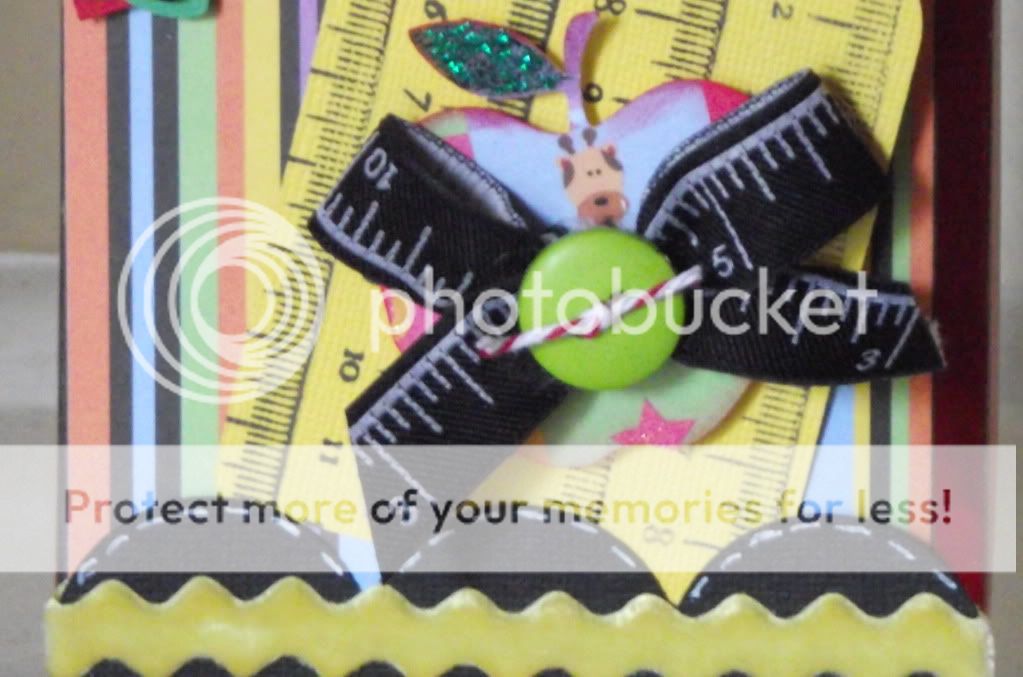
As I said before, all the cuts on this bag, including the bag, came from PS.  Most of the gems on this cart are at the endof the book.  I made the tag so that you can pull it out and write a note on the back.  It will slide back in and fit snuggly by the sentiment and the border on the bottom of the bag.


 I used the Roly Poly feature to cut a fatter apple.  I added some ticking with my white pen to the border for a little more flair.  Fill this gift bag with a few pens, pencils and a couple of stacks of post-it notes and send it to school with your child on the first day.  Guess who will be the apple of the teacher's eye then!!

I hope you have enjoyed this project and remember to check back all week for other projects made with this week's Spotlight Cartridge Plantin Schoolbook!

Smooches,