
 Hi everybody. Here is my entry for the Cricut Circle Magazine Ornament Challenge. I absolutely love the way it all came together!
When I saw this challenge, I knew two things: I wanted to use the colors we all see on the Children's Christmas trees and I wanted to challenge myself to use the cuts in a different way then what the booklet shows. I think I accomplished both points.
I am going to give this ornament to my God children (who are 4 and 2) so it is was extra important to me to make it a nice ornament.
Here are the details
Carts
- Christmas Cheer - trees, sleigh, gift, circle
- Printing Press - words and numbers
- Sentimental - pocket, scalloped circle
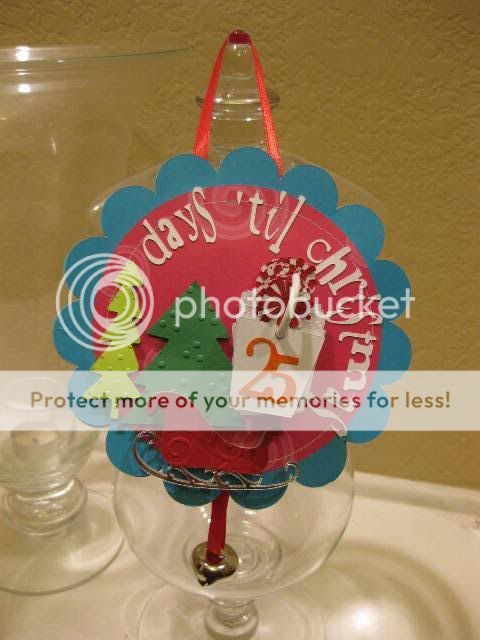
First, I cut the 2 circles and 2 scalloped circles from coordinating bright colors. I made the scalloped circle largerthatn the regular circle so I could layer them.

I glued the circles to each other and sewed around the edge for a little more detail.

This is a picture of all the embossing folders I used on this project. As you can see, some of them are Cuttlebug and some are from Sizzix.

Here is the front of the ornament with all the cuts in place. I cut each item twice and layered it. I cut the base of the sleigh out of metallic silver so the rails would be true. I cut the body of the sleigh in red. I embossed all the top layers with different designs.

I made a pocket to put on the back of the ornament. This is where all the days will go once they have been pulled off. I decided to emboss the front with one folder and the back with another (see picture below). Remember to turn your pocket over so when you fold it and put it together, your embossing will be facing out.

I had to think of a way to hang the days on the ornament. I decided to use a metal cup hook. In the picture below, you can see that I had to cut off the screw part so that it wouldn't stick through the back of the ornament.

To support both the hook and the ornament itself, I decided to sandwich a thin wooden disk between the layers. I'll be honest. My first attempt at securing the hook to the disk was unsuccessful. I used E6000 glue to put it on the disk but I didn't have a hole in it (that's why you see glue on the disk already). I removed the hook and the glue, punched a hole in the disk with my Anywhere Hole Punch, put the hook in the hole with some glue and tried again. This time it worked!


Here's a side view and a view of the back. I plan to put Merry Christmas on the pocket so when the countdown is over on Christmas day, you can turn the ornament over and leave that side showing until you take your tree down.


Awesome ornament!!
ReplyDelete