Showing posts with label Tags. Show all posts

Wednesday, March 27, 2013

Easter Tags

Hello everyone!  Easter season is upon us and I made a few treat bags.  I took them to my scrappy friends I scrap with each month.  They loved them.  Here they are!


Materials
  • Stamp - Chocolate Bunny by SU!; Happy Easter - $1 bin at Michaels
  • Inks - Close to Cocoa, Basic Brown, Chocolate Chip and Glorious Green (all SU!); Tattered Rose (Tim Holtz)
  • Punch - 1 3/4 in circle (SU!)
  • Stash - white tag, button and raffia
I stamped the bunny image 3 times in 3 different colors of ink.  I wanted to make it look like different flavors of chocolate.  I then stamped the sentiment and punched it out with my cricle punch.

I edged all the pieces with the TH Tattered Rose ink to give it a more vintage look.  Topped the tag off with a button and some rafia to complete the treats.

These tags were simple and easy to make.  So if you are needing to make a large amount, think about using this design.  Let me know what you all think about them and I hope to see you back here soon.  Have a very Happy Easter!  Until next time...

Smooches!

Robin

Tuesday, January 29, 2013

Tagapalooza - Birthday and Valentine Style

Hey Divas!  I'm back with 3 tags I made - 2 for birthday and 1 for Valentine's Day.  Here they are!


Materials and Cartridges
  • Party Hat and 6 - Birthday Bash Cartridge
  • Latice Tag - French Manor Cartridge
  • 8- Letter Envy Cartridge
  • Butterfly - Paper Trimmings Cartridge
  • Ink - SU Pink Passion and Whisper White
  • Valentine's Paper - "Sweet Love" by Little Yellow Bicycle
  • Happiness Birthday Stamp - Jaded Blossom "Sweet Birthday Wishes" collection
  • Stash - everything else

Here's aValentine's Day Tag I made with a collection of papers I just love.  Isn't it cute?!

What's a tag without a little bling on it?!  I added some bling on the doily I used for the background.  I layered on a fabric tag that I added a gingham bow to.  I love all the pinks and reds.


The collection include a bunch of Journaling Tags.  So I included one of those on the tag.  I added a row of TH rose ribbon on top of that with more bling in it.  It finished off the tag nicely.

Here's a tag I made for an 8 year old.  I wanted to make a butterfly taking light because I think that's exactly what she is doing.  

I used the Martha Stewart Coarse Glitter on the 8 and the buttergly to make it sparkle.  I stamped the sentiment on a little flag.  So cute!

The butterfly is 3-dimensional with it's wings standing up.  It really turned out nice and makes a great statement on the tag.

This tag is for my gorgeous God-daughter, Layla.  She was turned 6 this month.  So I made this tag for her gift bag.  

I made these tags at a crop with my crafty friends.  She had some of the new January release stamps from Jaded Blossom, including the Sweet Birthday Wishes set.  I used it at the top where I also placed a bow made from seam binding and some bling.

My sweet God-daughter is very stylish.  She loves anima print so I included that on her tag.  I then took it over the top with the bling in the shape of the 6.  I added more bling on the hat to top the whole tag off.  I edged the cream base with the pink ink to bring that finish to the tag.

I am very happy with all 3 tags.  If you like my creations, leave me some blog love and let me know.  Thanks so much everyone!  Until next time...


Smooches!!


Robin

Tuesday, May 8, 2012

Teacher Appreciation Tag and Card

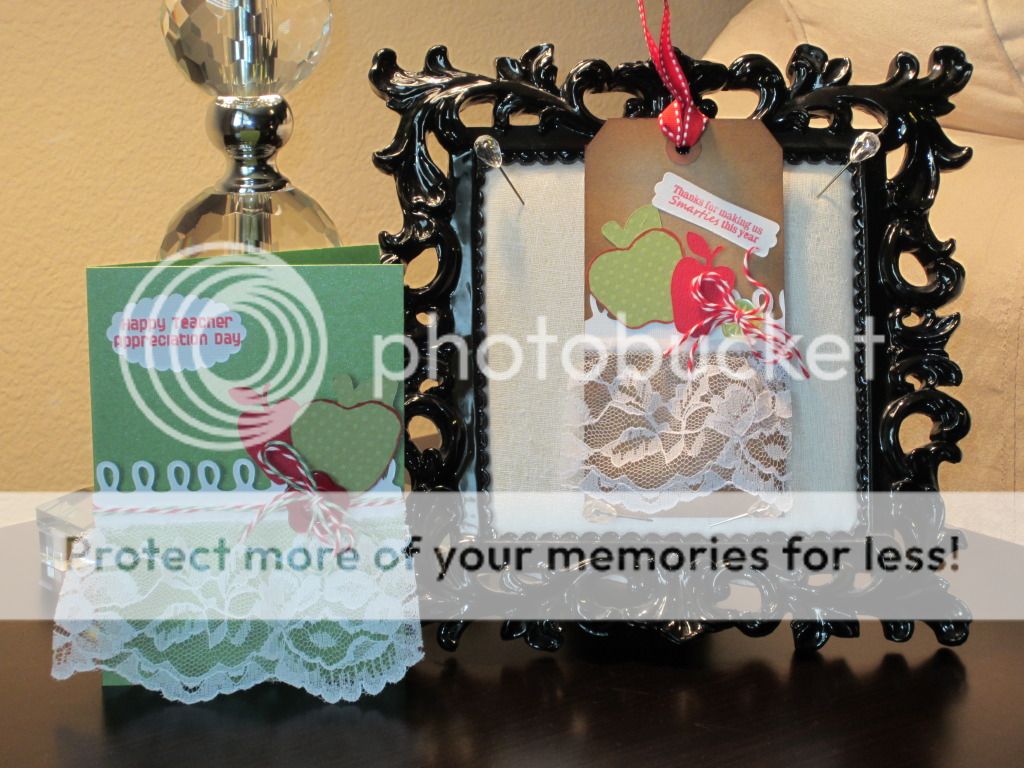
Hi everyone!  I am here with my first two projects from my retreat this past weekend.  Since it is Teacher Appreciation week, I thought it was appropriate to make some tags and cards for my fellow educators.  So here they are!


Carts and Materials
  • Doodlecharms - green apple
  • Plantin Schoolbook - red apple
  • MS Elegant Cake Art - loop border
  • Stamps - "Teacher Appreciation" set by Jaded Blossom
  • Twine - The Twinery
  • My Stash - lace, buttons, inks and paper


I started with a sparkly green card for the base.  I layered the loop border on with 2 kinds of twine and some pretty wide lace.  I then layered on some apples for that teacher influence.  Finally, I ran the twine through a large red button and then tied a bow.  I really like the way it all came together!


Now, for the tag!


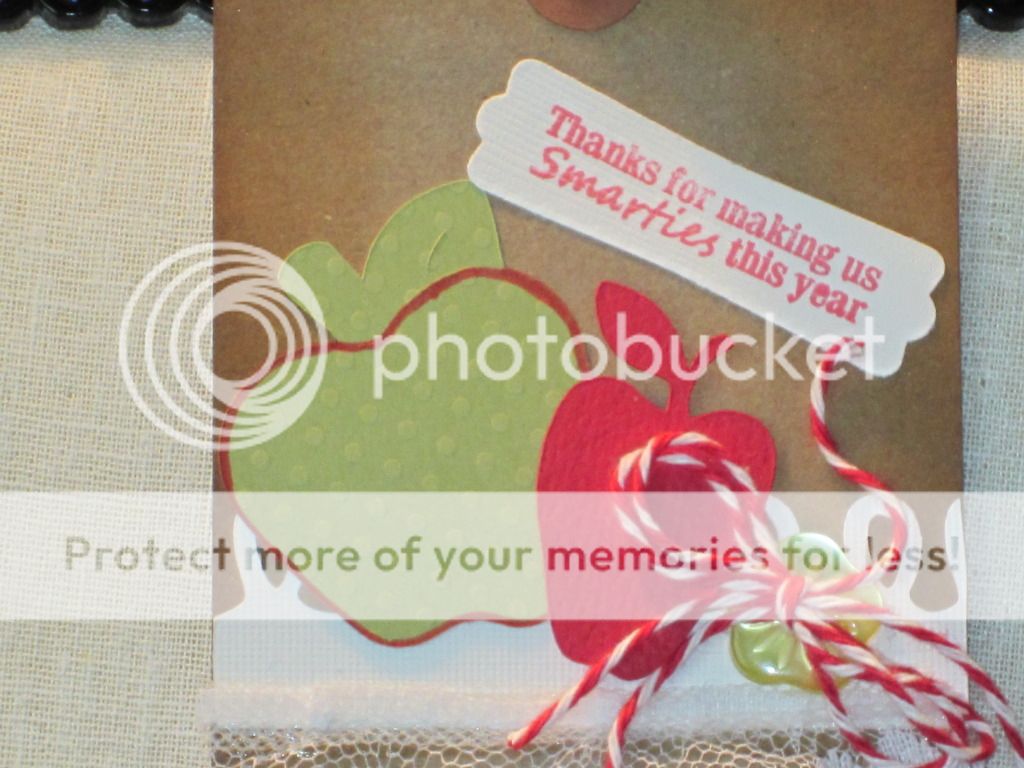
I started with a natural card base.  I inked the edges with Tim Holtz Distress Ink in Vintage Photo.  I then added the loop border and lace.  I added the apples and glued on the button and twine.  I stamped the sentiment on a punched out tag, ran some ribbon through the top and and called it done. 


I have to send a shout out to my friend Stefani for letting me borrow her Teacher
Appreciation stamp set by Jaded Blossom.  It really helped complete the tag and card.  That's all for now.  I'll post another project soon.  Until then...


Smooches!

Robin


Sunday, December 4, 2011

12 Tags of Christmas - My Version of Tag #2

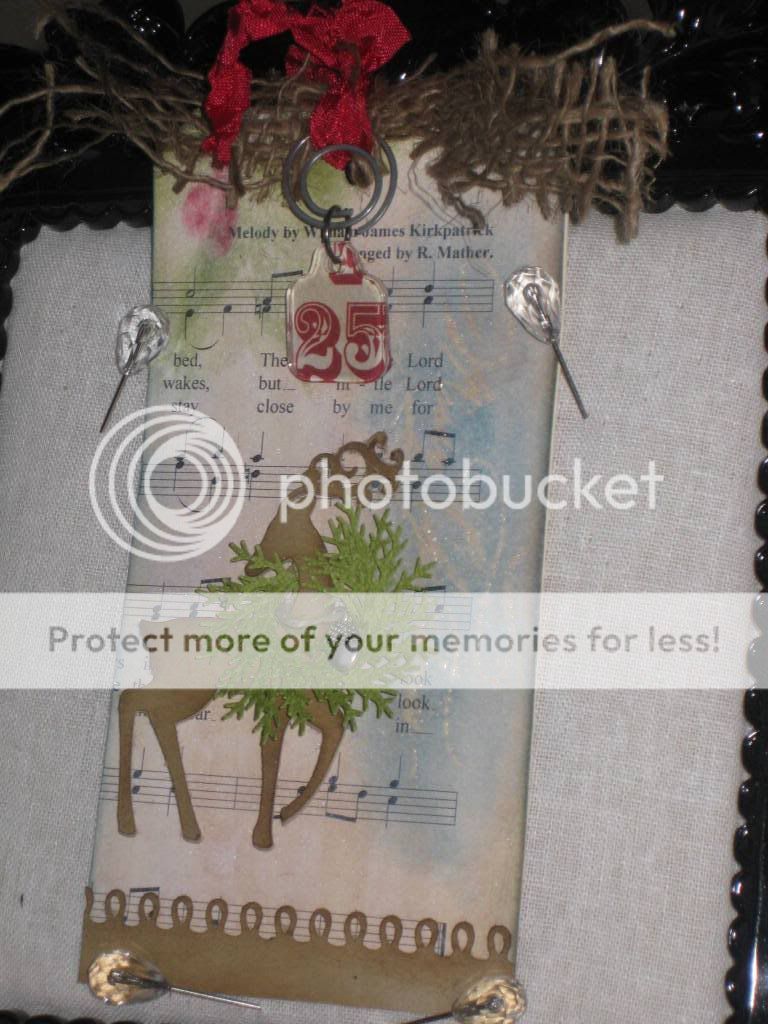
As many of you know, Tim Holtz is in full swing with his annual 12 Tags of Christmas.  These tags are truly works of art and he encourages us to make our own version of the tags.  I have loved each and every one but I decided to start my attempts with Tag #2.  Here it is!


Carts and Materials (Warning: This list is long!)
  • Christmas Cart - Reindeer (cut 3 times)
  • George and Basic Shapes - circle (for wreath base)
  • MS Elegant Cake Art - border
  • TH Distress Inks - Peeled Paint, Fired Brick, Stormy Sky, Vintage Photo
  • TH Distress Stain - Picket Fence
  • Versa Mark Embossing Ink
  • Stamp - SU Hand Penned Holiday
  • Punch - MS Pine Branch
  • Perfect Pearls Mist in Perfect Pearl
  • My Stash - twine, acorn charm, red seam binding, TH Fragments Charm, round paper clip, tag
Making this tag was more involved for me because I didn't have everything that Tim used in his tag.  He used his line of paper that already had the vintage look and an embossed saying.  I had to create mine.  I started with some free Christmas sheet music I found on the internet.  Once printed, I aged it with my TH vintage photo ink.  I then lined it up with my tag and cut out the shape. 


I covered the entire tag with the TH Distress Stain in Picket Fence.  You need to let this soak in the paper for a few seconds and then hit it with a heat gun.  I wanted to create the embossed design on the right side of the tag.  I found a "Merry Christmas" stamp I had from SU and stamped that with my Versamark pad.  I covered it with UTEE (Ultra Thick Embossing Powder) to make it really stand up and then hit it with the heat gun.  In an effort to make it stand out even more, I went over the raised image with TH Distress Ink in Stormy Sky.  I wish I had had a stamp with more coverage.  I think my stamp is too fine to really show up.

I tried to create the illusion of a holly sprig and berries with my inks.  I turned out ok.  After everything was dry, I spritzed the tag with Perfect Pearls Mists in Perfect Pearls.  The splatters look like snow flurries.  I edged the whole tag with the TH Stormy Sky ink.

Next, I cut the reindeer at 3" 3 times and glued them all together.  I distressed the top layer with TH Vintage Photo ink.  I layered 2 circles (one smaller than the other) inside each other to make a ring,  I covered the ring with pine sprigs punched with the MS punch.  I really like the way it turned out.  I also put a charm on a piece of twine and tied it around his neck.  I put some pop dots on the back and attached him to the tag.

To finish off the tag, I attached a strip of burlap to the tap with some red seam binding.  Once in place, I attached a tag made from a TH fragments and scrap paper to a round paper clip and looped it through the seam binding.  Now, finally, the tag was complete!

This puppy took some work but I am very pleased with the final results.  As always, leave me some blog love and tell me what you think.  And please check out Tim's 12 Tags of Christmas on his blog.  His creations are breath taking and you can learn tons of techniques.  Click here to go to his blog.  Until next time...

Smooches!


Monday, May 30, 2011

Spring Plate - Circle Blog Monthly Challenge Entry

I am pushing it here folks.  I have about 2 hours left to get my project entered into the Cricut Circle May Monthly Blog Challenge.  I just might make it!
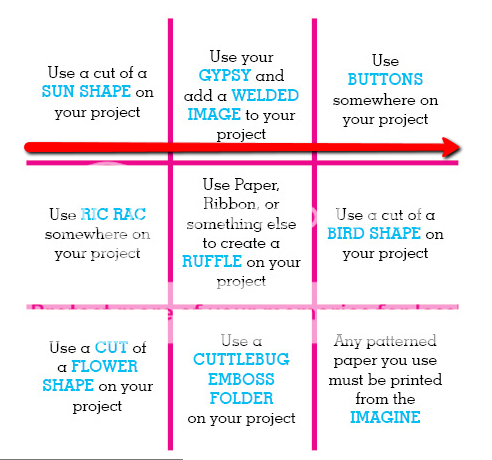
This month's challenge was a Tic-Tac-Toe board where the crafter chose 3 squares in a tic-tac-toe formation.  Here is the 3T board and the red arrow shows what I chose to use in my project.

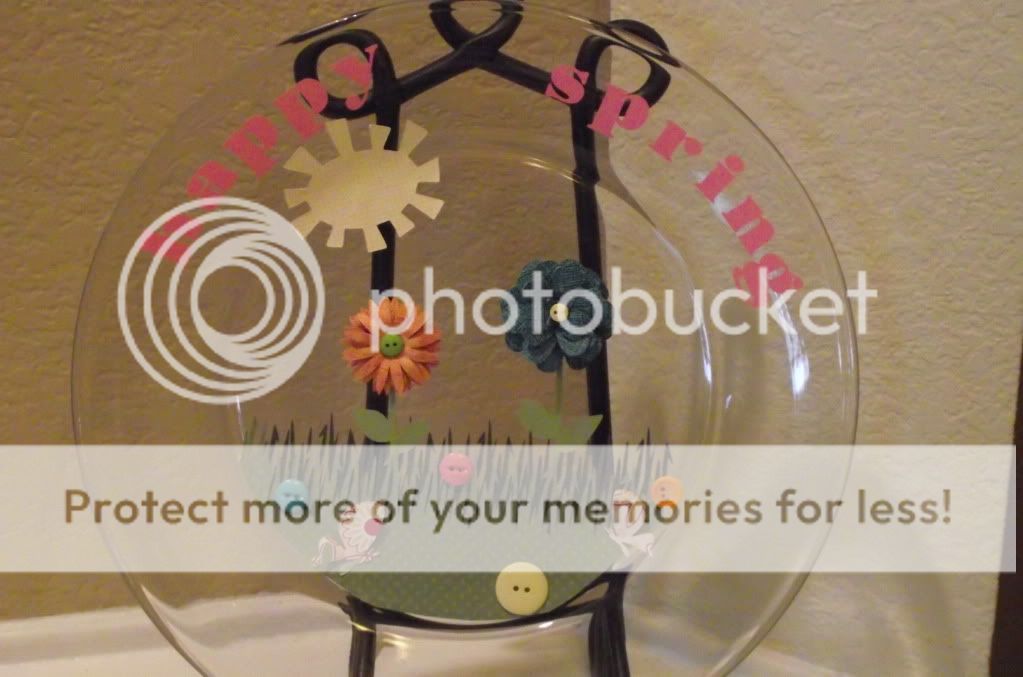
And here is my project!  It's a Spring Plate for my home.

Here is how I put this project together.

Carts
  • Base Camp - rectangle (welded to the grass)
  • Cindy Loo - font
  • Doodlecharms - sun
  • Gypsy Wanderings - grass, flower stem, butterfly
  • Nifty Fifties - daisy flower
  • Sugar and Spice - inside of rose
  • Tags, Bags, Boxes and More - rose
I got the plate from Wal-mart at Christmas time (there was a post on the blog using it).  It is about the size of a charger.


I used vinyl for the wording on this plate.


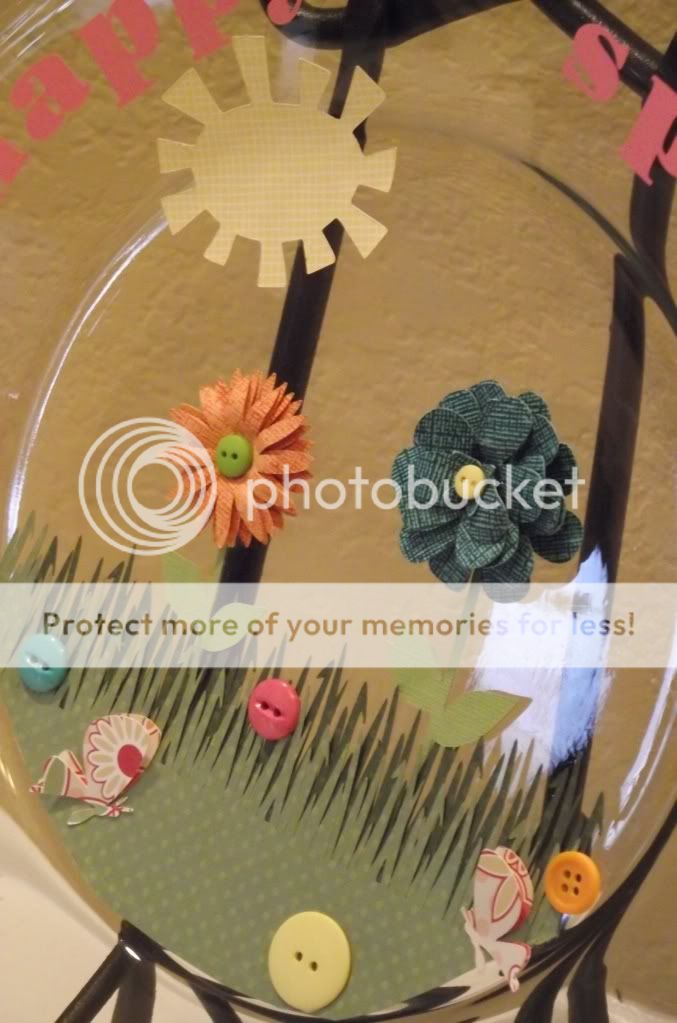
I used Juliana's directions and video to make the flowers.  I used different cuts but the results were still beautiful!


I love this sun cut!  It is my favorite and the one I go to when I need a sun for my project.

Side view so you can see the dimension on the flowers and all the buttons in the grass posing as flower buds!  I also used 2 layers on the butterflies that allowed me to pop up the wings. 


I hope you enjoyed this project.  Now I need to make one for Summer!  Until next time...


Smooches,