Showing posts with label Birthday Bash. Show all posts

Tuesday, January 29, 2013

Tagapalooza - Birthday and Valentine Style

Hey Divas!  I'm back with 3 tags I made - 2 for birthday and 1 for Valentine's Day.  Here they are!


Materials and Cartridges
  • Party Hat and 6 - Birthday Bash Cartridge
  • Latice Tag - French Manor Cartridge
  • 8- Letter Envy Cartridge
  • Butterfly - Paper Trimmings Cartridge
  • Ink - SU Pink Passion and Whisper White
  • Valentine's Paper - "Sweet Love" by Little Yellow Bicycle
  • Happiness Birthday Stamp - Jaded Blossom "Sweet Birthday Wishes" collection
  • Stash - everything else

Here's aValentine's Day Tag I made with a collection of papers I just love.  Isn't it cute?!

What's a tag without a little bling on it?!  I added some bling on the doily I used for the background.  I layered on a fabric tag that I added a gingham bow to.  I love all the pinks and reds.


The collection include a bunch of Journaling Tags.  So I included one of those on the tag.  I added a row of TH rose ribbon on top of that with more bling in it.  It finished off the tag nicely.

Here's a tag I made for an 8 year old.  I wanted to make a butterfly taking light because I think that's exactly what she is doing.  

I used the Martha Stewart Coarse Glitter on the 8 and the buttergly to make it sparkle.  I stamped the sentiment on a little flag.  So cute!

The butterfly is 3-dimensional with it's wings standing up.  It really turned out nice and makes a great statement on the tag.

This tag is for my gorgeous God-daughter, Layla.  She was turned 6 this month.  So I made this tag for her gift bag.  

I made these tags at a crop with my crafty friends.  She had some of the new January release stamps from Jaded Blossom, including the Sweet Birthday Wishes set.  I used it at the top where I also placed a bow made from seam binding and some bling.

My sweet God-daughter is very stylish.  She loves anima print so I included that on her tag.  I then took it over the top with the bling in the shape of the 6.  I added more bling on the hat to top the whole tag off.  I edged the cream base with the pink ink to bring that finish to the tag.

I am very happy with all 3 tags.  If you like my creations, leave me some blog love and let me know.  Thanks so much everyone!  Until next time...


Smooches!!


Robin

Saturday, July 16, 2011

It's A Wrap Blog Hop - Clownin' Around Birthday Bag

Welcome to the It’s a Wrap Blog Hop hosted by Cool Beans By L.B. Do you like to receive gifts? How about give them? Well this hop is all about the outside…the wrapping; Gift bags, boxes, baskets and more. There are 22 wonderful stops on this hop and we hope you will take some time to stop in and see everything we have created for you.

You should have arrived here from, Everything Digital Scrapbooking. If you are just finding our hop in the middle you can go to the beginning at Cool Beans By L.B.

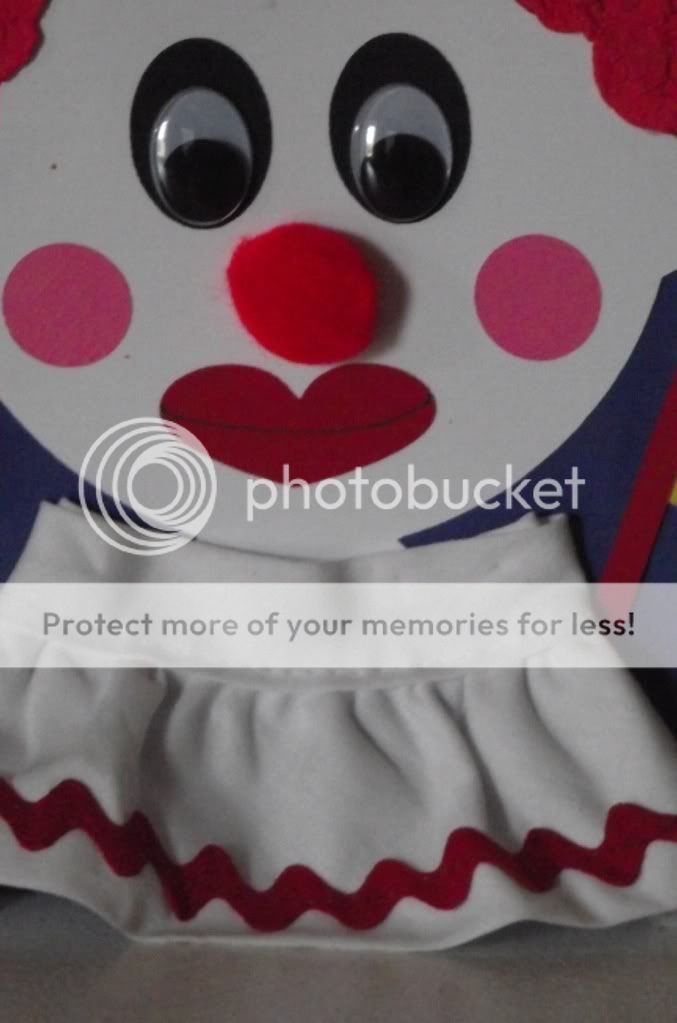
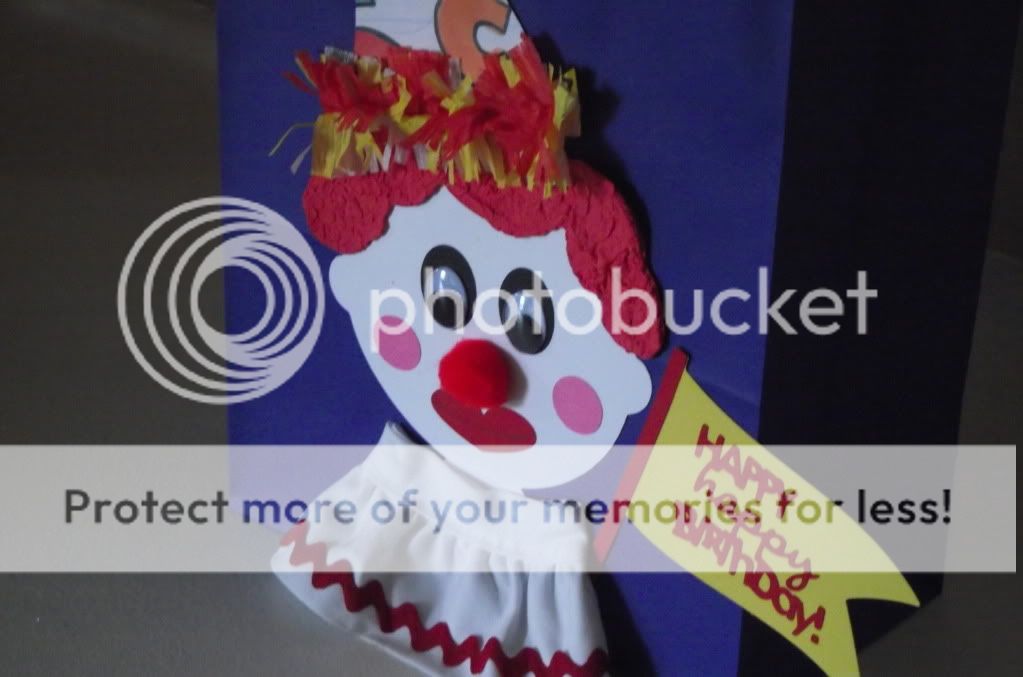
For my project I made an adorable clown gift bag.  I recently went to my friend's twin's birthday party and needed a gift bag for their gifts.  The party theme was circus so I made this clown bag.

Carts and Materials
  • Birthday Bash- clown hat, pennant
  • George and Basic Shapes - circle, oval
  • Once Upon A Princess - heart for the lips
  • Paper Doll Dress Up - clown head, hair base
  • Tulip Puffy Paint - for clown hair
I cut a head from the Paper Doll body at about 4.5 x 5.  I cut just the head on my Gypsy by having the rest of the body hang off the mat.  There is a clown outfit on this cart and one of the accessories is hair.  So used that cut for the base.


I looked up clown faces on the internet to decide what I wanted him to look like.  I don't have a cart with lips on it so I decided to use a stretched out heart as my lips.  I added pink cheeks and ovals for the base of he eyes.  I then found some oval googly eyes that were perfect.  And no clown is complete without a pom-pom red nose!  I used some ruffle I had in my stash for the fluff around his neck.  I love the ric-rac and the look it adds.

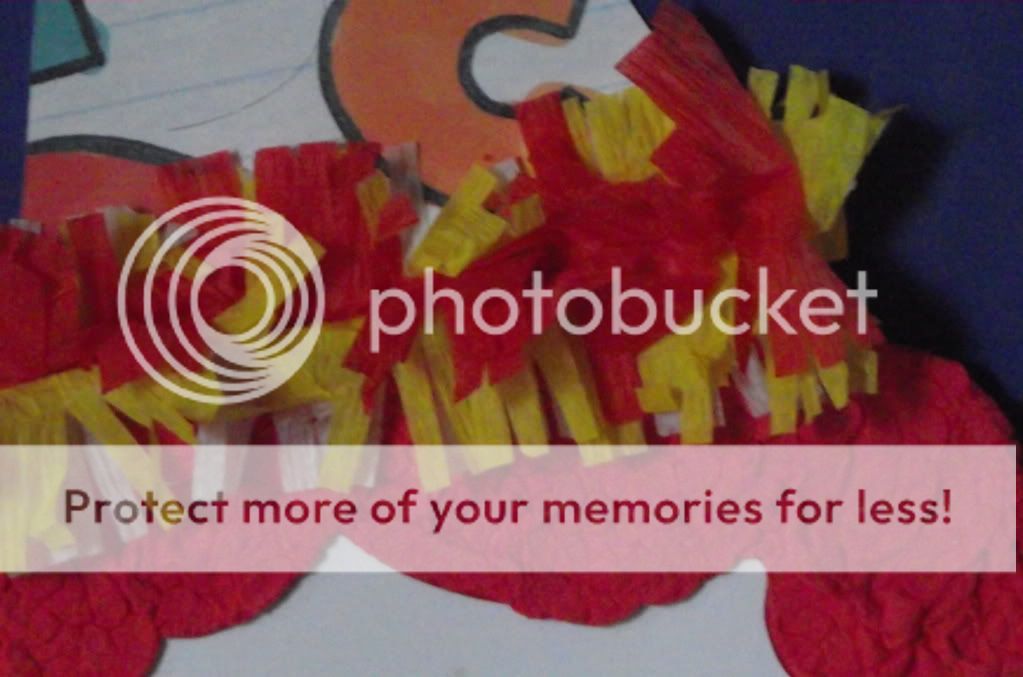
These just may be my 2 favorite parts of the bag - the hair and the ruffle on the party hat.
For the hair - I used Tulip Puffy Paint.  What you do is you add a generous amount of the paint to your base.  Once you have covered the entire thing, you then heat it up with your heat gun.  After a few seconds, it will puff up like popcorn and give your project great texture.  Try using white in the Winter for snow!

For the hat ruffle - I used a couple of pieces of crepe paper (use the old fashioned rolls we used for streamers) and folded them in half.  I then stapled them to hold them together.  I pulled out my MS Fringe Scissors and cut the fringes.  I attached it to my hat with glue and fluffed it out.

I added a yellow pom-pom to the top of the hat, added the birthday pennant and this bag was complete.  I really hope you liked my project and leave me come blog love!
I
 am offering some fun blog candy on this hop in the form of a Mystery Box!  The only thing I am going to tell you is that it will include some fun chipboard from Maya Road!  Here's what you have to do:
  1. Leave me some blog love! ( I love comments)
  2. Become a follower
  3. Leave your email address in the post
That's all you have to do!

Thanks for stopping by on this fun hop. Your next stop is Gamma's Creative Corner.  Until next time...

Smooches!


Thursday, July 14, 2011

Texas, The Lone Star State Pennant

I'm back again with another project this week!  My scissors and cricut machine are getting some miles put on them this week.  I'm entering another contest on the Cricut Circle and this time we had to create a pennant that represented our state, country or province.  Here is my project.


Carts and Materials
  • 50 States - shape of Texas, Bluebonnet
  • Birthday Bash - Pennant
  • George and Basic Shapes - star
  • Indie Art - rose
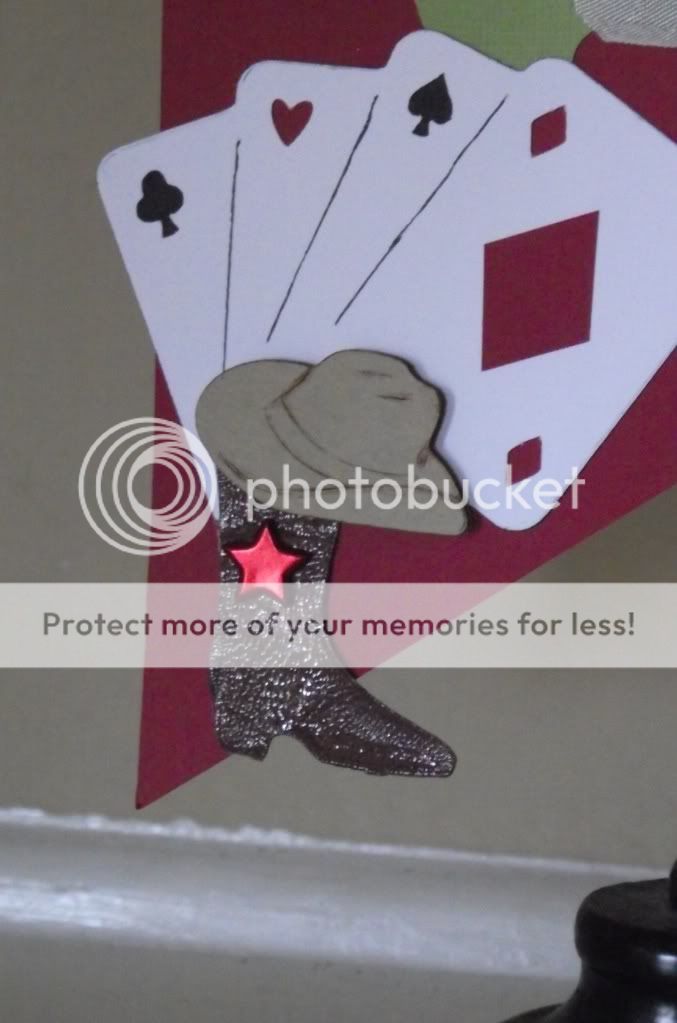
  • Old West - font, hat, boot, longhorn, cards
The background of the pennant is the Texas State Flag.  To make the star more dimensional, I pinched each point and then put pop dots on the back to raise it up.  I cut the title shadow twice to make it standout more.  I like the old west typeface which harkens back to the state's history.

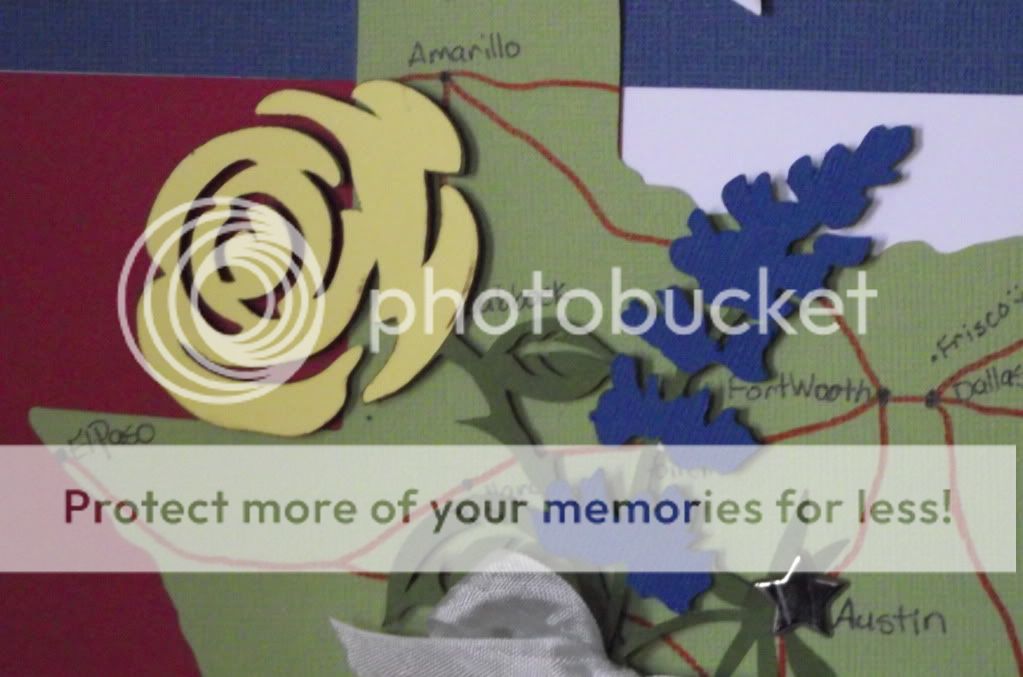
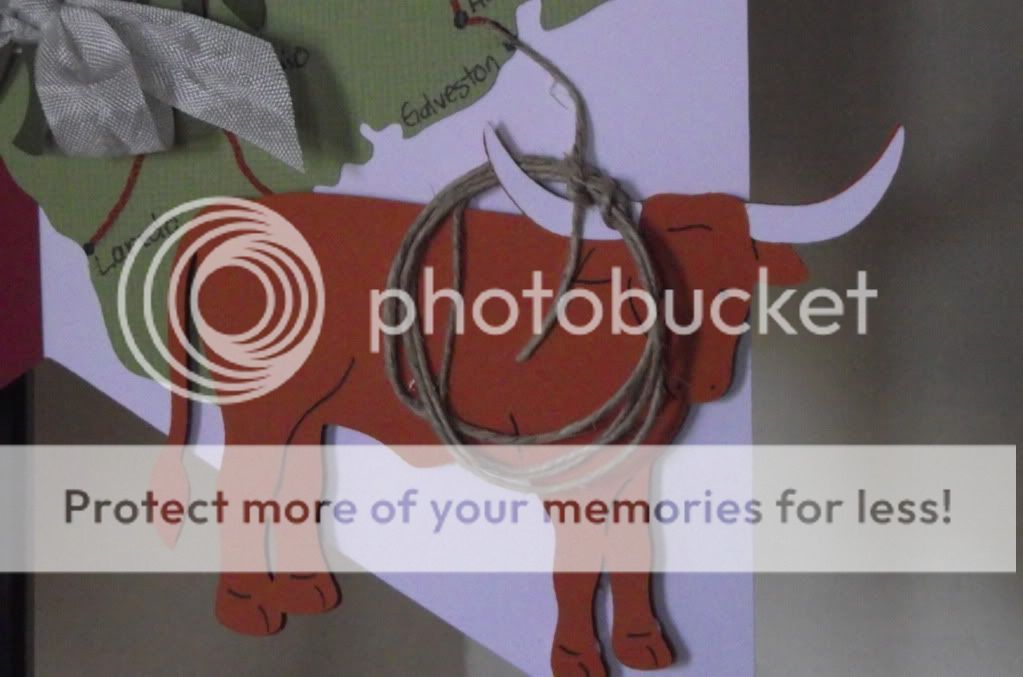
I hand drew a map on the green Texas shape.  It shows some of the most popular cities with a small shout out to Frisco where I live.  I also included the official (Bluebonnet) and unofficial (Yellow Rose) flowers of Texas.  They are tied together in friendship.  The Spanish word for Texas is Tejas, which means friendship.


The cards represent Texas Hold 'Em, the most popular form of poker.  An no self respecting cowboy would ever be caught without their well worn boots and trusty hat.

Longhorn cattle are legendary in Texas and also the mascot of The University of Texas.  And you will need a lasso to catch one or practice your trick roping.


I used lots of pop dots on this project so I hope it gets to Utah in one piece.  Thanks for checking out my post and sharing this project with me.  I hope you will leave me some blog love!  Until next time...

Smooches!


Monday, July 11, 2011

Parisian Mini Album and Video

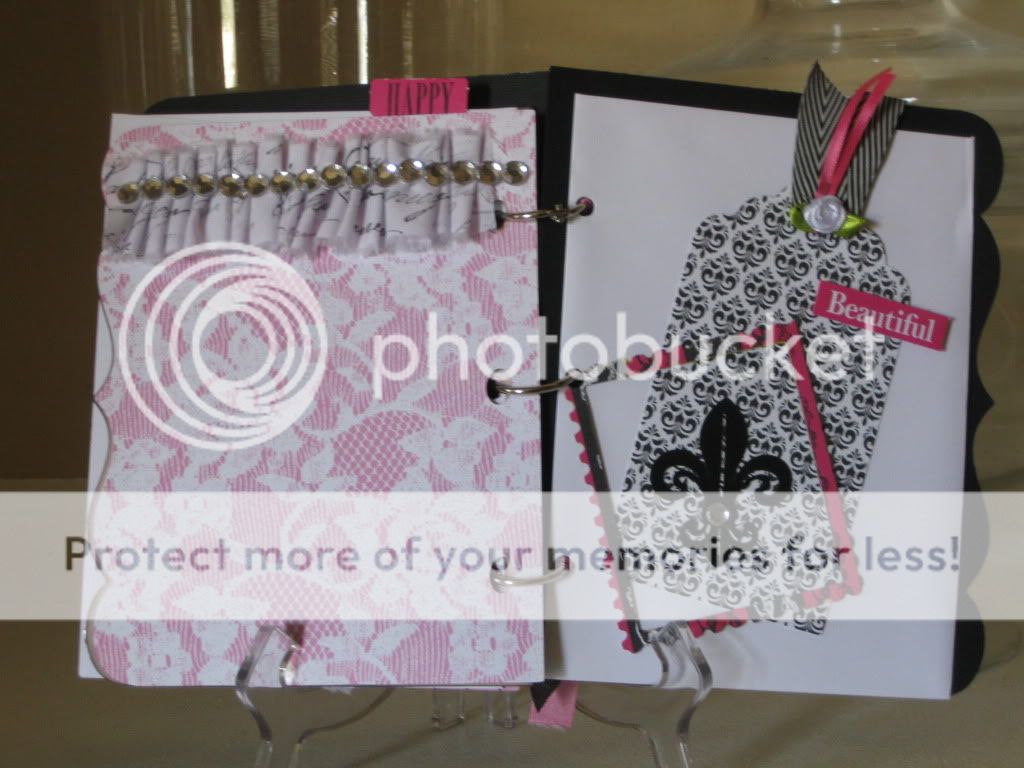
Hi eveyrone!  Got a new project today that is serving me double duty.  It is a mini album for my mom as well as my entry into the Teresa Collins Cricut Circle Challenge (try saying that 3 times!).  This post is chock full of pics and there's even a video at the end.  So let's get to it!

Carts and Materials
  • French Manor - fleur de lis, Paris, frame, borders, dress form, lattice frame, chandelier
  • Birthday Bash - cover and page shape
  • Destinations - Paris tag (pink glitter and black)
  • Summer in Paris - Eiffel Tower
  • Tags, Bags, Boxes and More - pocket and tag
  • Teresa Collins - paper, blingage, stamps, sentiments, various other elements
  • My Stash - ribbons, pins, doilies, rosettes, bling, charms
I'm not going to go into the details about the elements in the mini like I usually do because all that information is in the video.  But I am posting pics of all the pages and a few closeups.


And now here's the video!


I am really proud of this project and I know my mom will love it.  I enjoyed making it and pushing my creativity.  Leave me some blog love and I'll talk with you later!

Smooches,


Tuesday, June 14, 2011

Dad's Still Smokin' - My Favorite Card Yet!

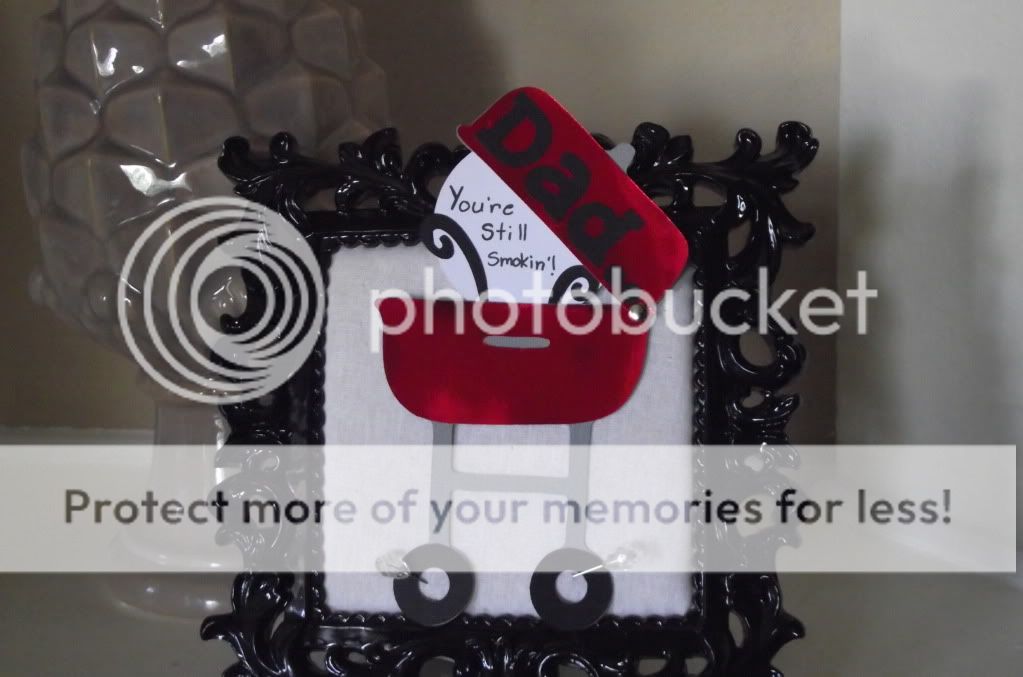
I am so proud of this card!  It turned out just exactly the way I envisioned it!!!  I'm going to get right to it.

I turned this...


..into this!!!

Here's the prescription!

Carts
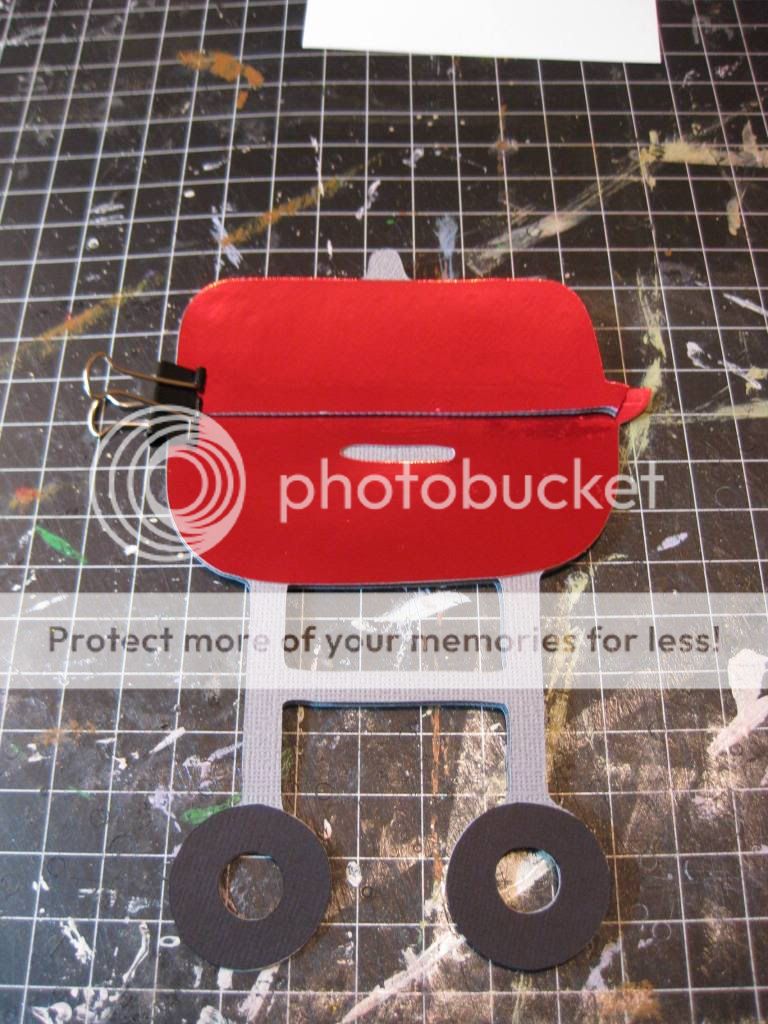
  • Everyday Paper Dolls - grill (4 cuts - 2 in gray, 1 red and 1 black)
  • Birthday Bash - font for senitment, circle, plumes
But wait!  There's more!!!
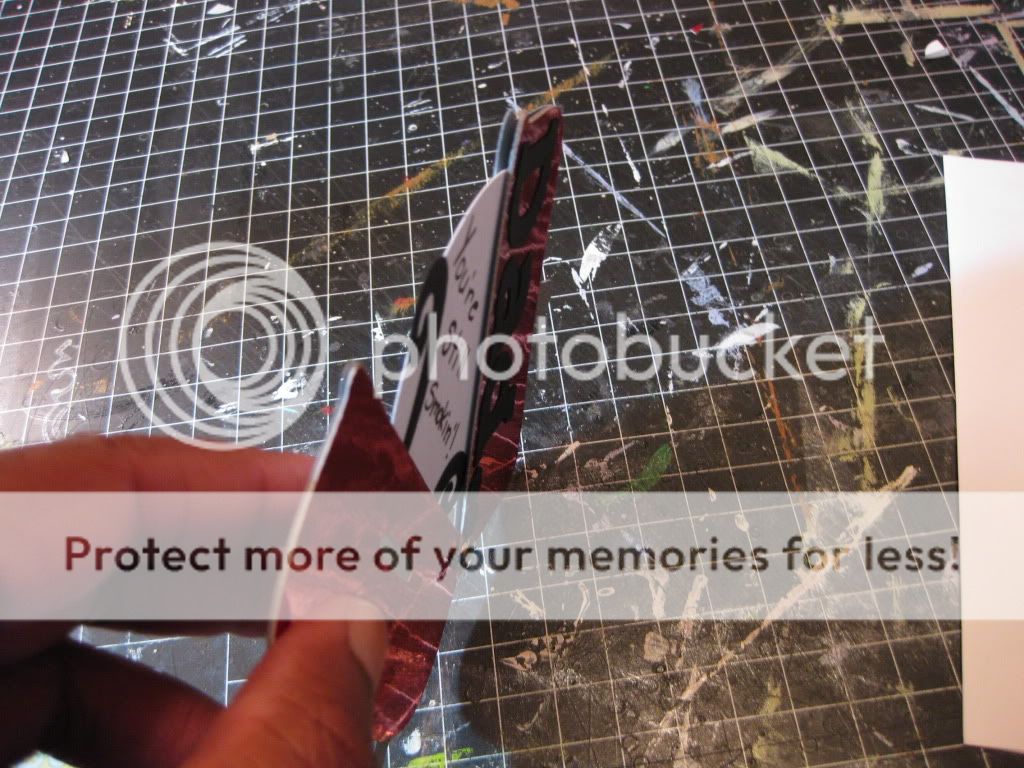
It opens up to reveal the sentiment!!!  Cute huh?!

The grill cut was an open grill so I altered it to make it close.  I wanted it to open and close so I snipped a part of the cut and added a brad to make a hinge.

I used a red metallic paper to make it look like the classic red Weber grill that everyone had back in the day.  I added a circle and a few "smoke plumes" to be able to add my sentiment and make the grill smokin'!

I had to make a pocket to hide the sentiment.  Here is how I did it.

 1.  Cut 2 grills out of gray cardstock.  Place them on top of each other and snip the corner that holds that top onto the bottom of the grill.

2.  Glue on your red and black pieces to the top layer and line up the top layer with the bottom layer.  Using a binder clip to hold all layers together, punch a small hole in the in the grill cover where the brad will go.  Make sure you overlap the layers a little so the brad will hold them all together.

3.  Place a bead of glue around the edge of the grill, leaving a little space before you get to the bottom of the cover.  Place another bead of glue on the legs and around the edge of the bottom of the grill.  This creates the pocket for the circle.

4.  Place a small bead of glue at the up edge of the circle and slide it into the top pocket of the grill.  You may have to play with this a little in order to make sure the circle is in the right spot to be covered up when you close the grill.  Glue the smoke plumes on and make sure everything fits when you close the grill.  Write your sentiment on there and you are finished!

Back of card

I will be dropping this card in the mail today for my dad who is an avid griller and bbq sauce maker.  I know he is going to love it!  Leave me some blog love and tell me what you think!!!

Smooches,