Showing posts with label George. Show all posts

Sunday, December 4, 2011

12 Tags of Christmas - My Version of Tag #2

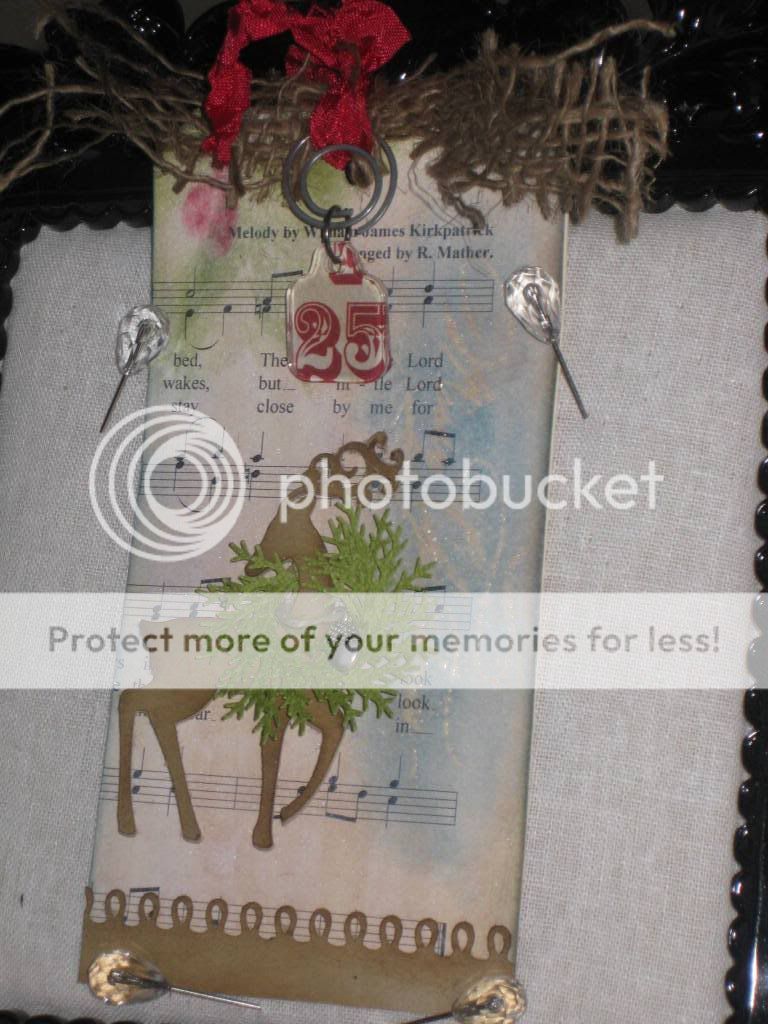
As many of you know, Tim Holtz is in full swing with his annual 12 Tags of Christmas.  These tags are truly works of art and he encourages us to make our own version of the tags.  I have loved each and every one but I decided to start my attempts with Tag #2.  Here it is!


Carts and Materials (Warning: This list is long!)
  • Christmas Cart - Reindeer (cut 3 times)
  • George and Basic Shapes - circle (for wreath base)
  • MS Elegant Cake Art - border
  • TH Distress Inks - Peeled Paint, Fired Brick, Stormy Sky, Vintage Photo
  • TH Distress Stain - Picket Fence
  • Versa Mark Embossing Ink
  • Stamp - SU Hand Penned Holiday
  • Punch - MS Pine Branch
  • Perfect Pearls Mist in Perfect Pearl
  • My Stash - twine, acorn charm, red seam binding, TH Fragments Charm, round paper clip, tag
Making this tag was more involved for me because I didn't have everything that Tim used in his tag.  He used his line of paper that already had the vintage look and an embossed saying.  I had to create mine.  I started with some free Christmas sheet music I found on the internet.  Once printed, I aged it with my TH vintage photo ink.  I then lined it up with my tag and cut out the shape. 


I covered the entire tag with the TH Distress Stain in Picket Fence.  You need to let this soak in the paper for a few seconds and then hit it with a heat gun.  I wanted to create the embossed design on the right side of the tag.  I found a "Merry Christmas" stamp I had from SU and stamped that with my Versamark pad.  I covered it with UTEE (Ultra Thick Embossing Powder) to make it really stand up and then hit it with the heat gun.  In an effort to make it stand out even more, I went over the raised image with TH Distress Ink in Stormy Sky.  I wish I had had a stamp with more coverage.  I think my stamp is too fine to really show up.

I tried to create the illusion of a holly sprig and berries with my inks.  I turned out ok.  After everything was dry, I spritzed the tag with Perfect Pearls Mists in Perfect Pearls.  The splatters look like snow flurries.  I edged the whole tag with the TH Stormy Sky ink.

Next, I cut the reindeer at 3" 3 times and glued them all together.  I distressed the top layer with TH Vintage Photo ink.  I layered 2 circles (one smaller than the other) inside each other to make a ring,  I covered the ring with pine sprigs punched with the MS punch.  I really like the way it turned out.  I also put a charm on a piece of twine and tied it around his neck.  I put some pop dots on the back and attached him to the tag.

To finish off the tag, I attached a strip of burlap to the tap with some red seam binding.  Once in place, I attached a tag made from a TH fragments and scrap paper to a round paper clip and looped it through the seam binding.  Now, finally, the tag was complete!

This puppy took some work but I am very pleased with the final results.  As always, leave me some blog love and tell me what you think.  And please check out Tim's 12 Tags of Christmas on his blog.  His creations are breath taking and you can learn tons of techniques.  Click here to go to his blog.  Until next time...

Smooches!


Saturday, July 16, 2011

It's A Wrap Blog Hop - Clownin' Around Birthday Bag

Welcome to the It’s a Wrap Blog Hop hosted by Cool Beans By L.B. Do you like to receive gifts? How about give them? Well this hop is all about the outside…the wrapping; Gift bags, boxes, baskets and more. There are 22 wonderful stops on this hop and we hope you will take some time to stop in and see everything we have created for you.

You should have arrived here from, Everything Digital Scrapbooking. If you are just finding our hop in the middle you can go to the beginning at Cool Beans By L.B.

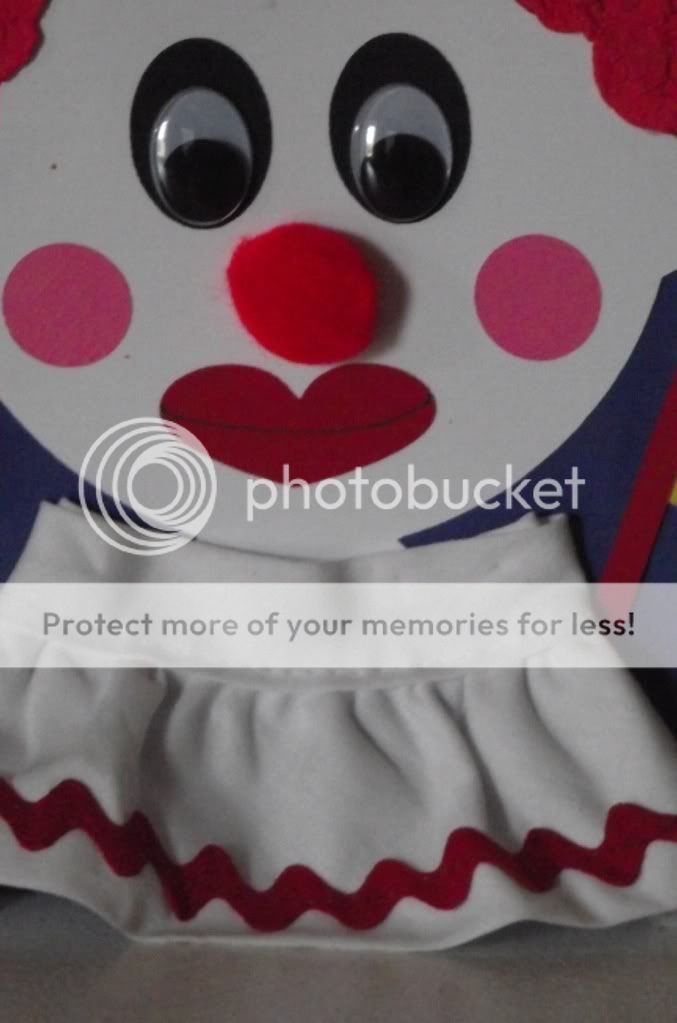
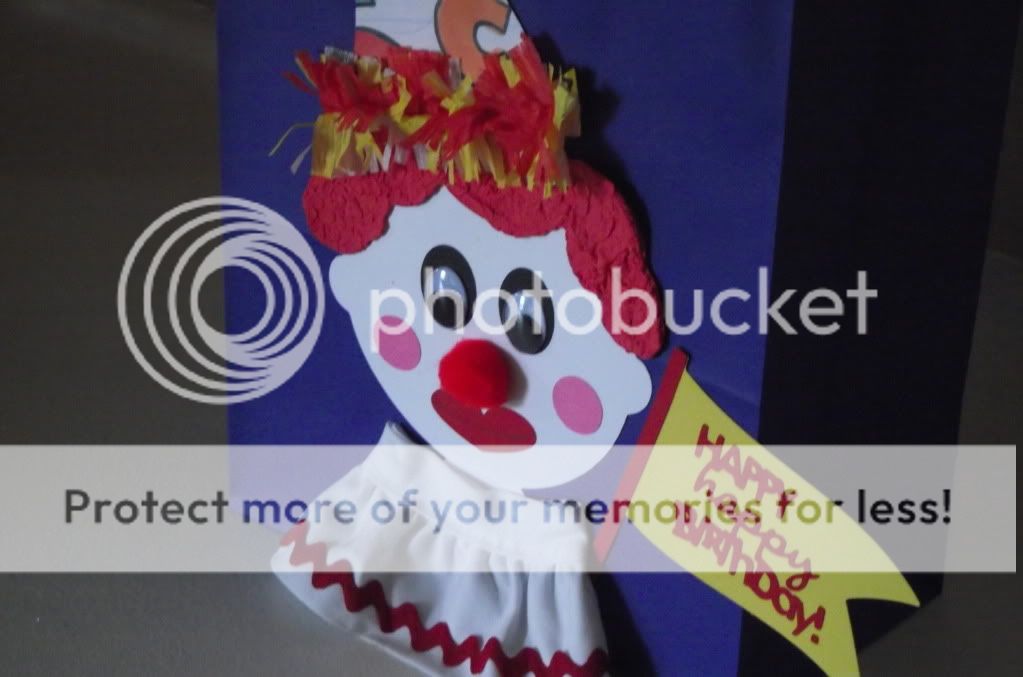
For my project I made an adorable clown gift bag.  I recently went to my friend's twin's birthday party and needed a gift bag for their gifts.  The party theme was circus so I made this clown bag.

Carts and Materials
  • Birthday Bash- clown hat, pennant
  • George and Basic Shapes - circle, oval
  • Once Upon A Princess - heart for the lips
  • Paper Doll Dress Up - clown head, hair base
  • Tulip Puffy Paint - for clown hair
I cut a head from the Paper Doll body at about 4.5 x 5.  I cut just the head on my Gypsy by having the rest of the body hang off the mat.  There is a clown outfit on this cart and one of the accessories is hair.  So used that cut for the base.


I looked up clown faces on the internet to decide what I wanted him to look like.  I don't have a cart with lips on it so I decided to use a stretched out heart as my lips.  I added pink cheeks and ovals for the base of he eyes.  I then found some oval googly eyes that were perfect.  And no clown is complete without a pom-pom red nose!  I used some ruffle I had in my stash for the fluff around his neck.  I love the ric-rac and the look it adds.

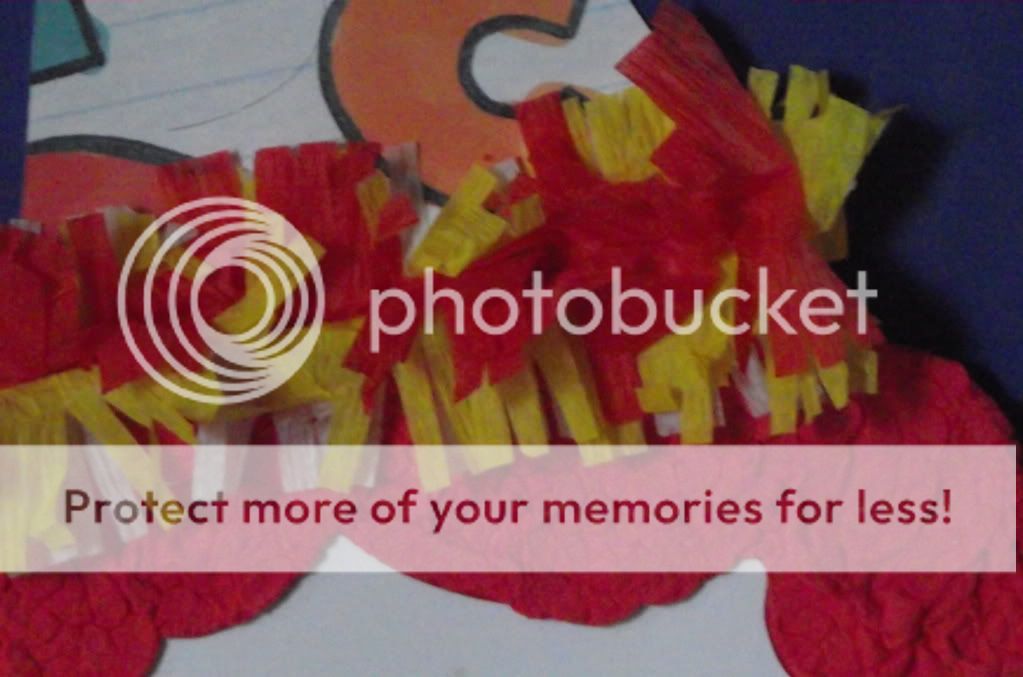
These just may be my 2 favorite parts of the bag - the hair and the ruffle on the party hat.
For the hair - I used Tulip Puffy Paint.  What you do is you add a generous amount of the paint to your base.  Once you have covered the entire thing, you then heat it up with your heat gun.  After a few seconds, it will puff up like popcorn and give your project great texture.  Try using white in the Winter for snow!

For the hat ruffle - I used a couple of pieces of crepe paper (use the old fashioned rolls we used for streamers) and folded them in half.  I then stapled them to hold them together.  I pulled out my MS Fringe Scissors and cut the fringes.  I attached it to my hat with glue and fluffed it out.

I added a yellow pom-pom to the top of the hat, added the birthday pennant and this bag was complete.  I really hope you liked my project and leave me come blog love!
I
 am offering some fun blog candy on this hop in the form of a Mystery Box!  The only thing I am going to tell you is that it will include some fun chipboard from Maya Road!  Here's what you have to do:
  1. Leave me some blog love! ( I love comments)
  2. Become a follower
  3. Leave your email address in the post
That's all you have to do!

Thanks for stopping by on this fun hop. Your next stop is Gamma's Creative Corner.  Until next time...

Smooches!


Thursday, July 14, 2011

Texas, The Lone Star State Pennant

I'm back again with another project this week!  My scissors and cricut machine are getting some miles put on them this week.  I'm entering another contest on the Cricut Circle and this time we had to create a pennant that represented our state, country or province.  Here is my project.


Carts and Materials
  • 50 States - shape of Texas, Bluebonnet
  • Birthday Bash - Pennant
  • George and Basic Shapes - star
  • Indie Art - rose
  • Old West - font, hat, boot, longhorn, cards
The background of the pennant is the Texas State Flag.  To make the star more dimensional, I pinched each point and then put pop dots on the back to raise it up.  I cut the title shadow twice to make it standout more.  I like the old west typeface which harkens back to the state's history.

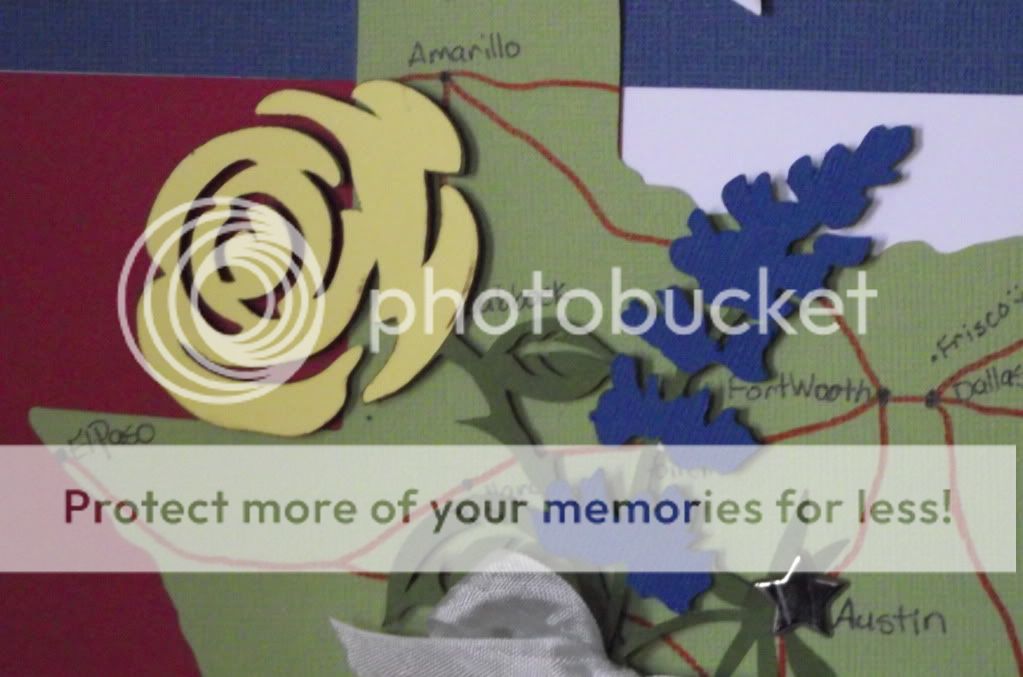
I hand drew a map on the green Texas shape.  It shows some of the most popular cities with a small shout out to Frisco where I live.  I also included the official (Bluebonnet) and unofficial (Yellow Rose) flowers of Texas.  They are tied together in friendship.  The Spanish word for Texas is Tejas, which means friendship.


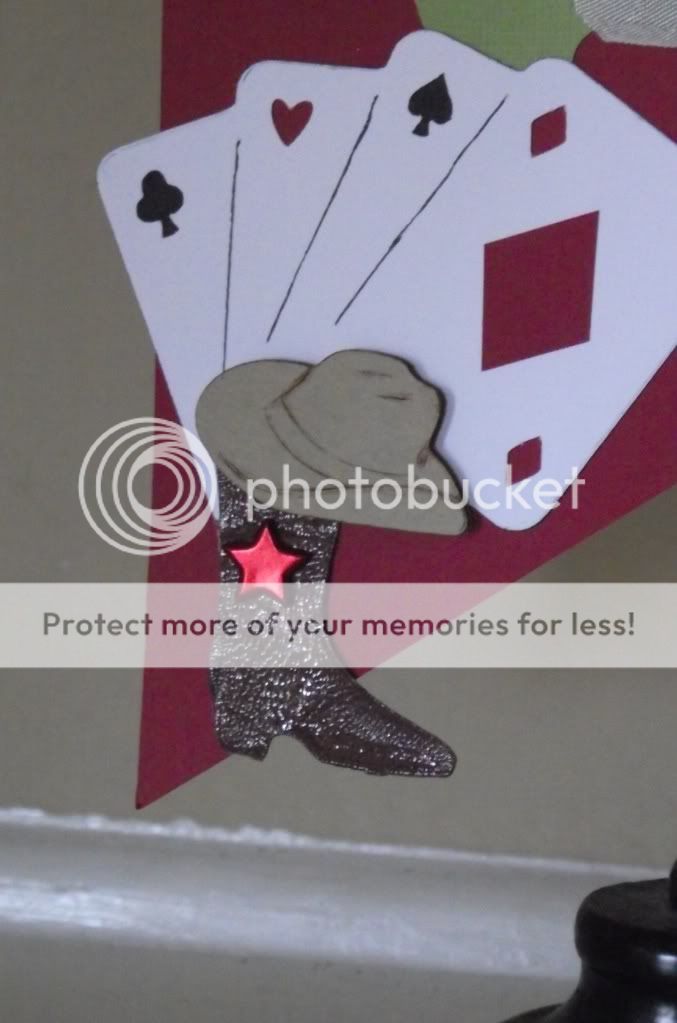
The cards represent Texas Hold 'Em, the most popular form of poker.  An no self respecting cowboy would ever be caught without their well worn boots and trusty hat.

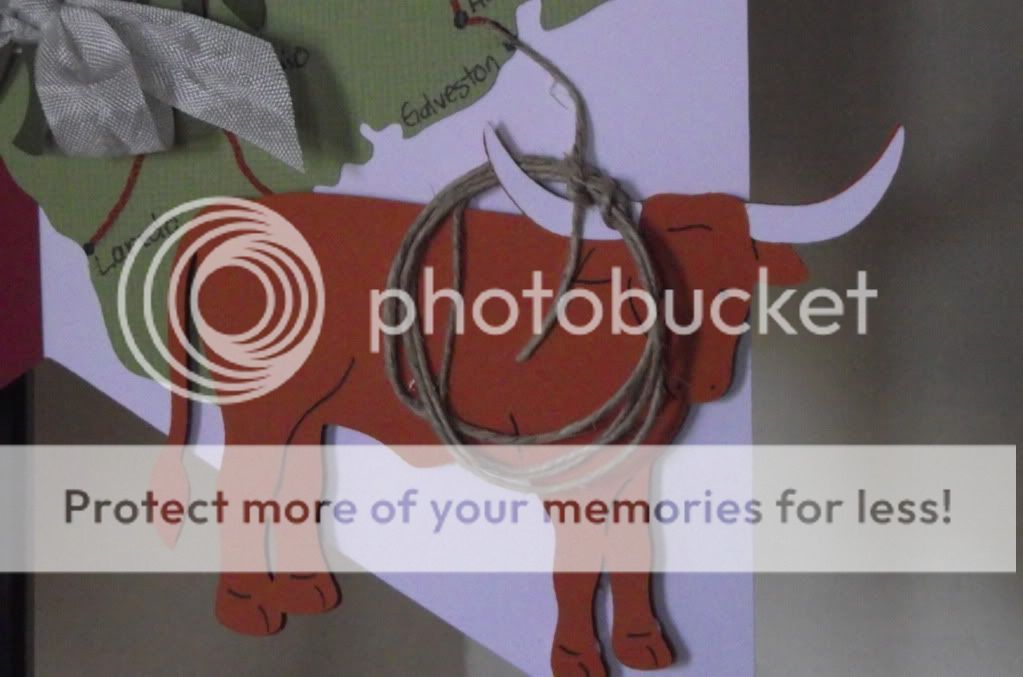
Longhorn cattle are legendary in Texas and also the mascot of The University of Texas.  And you will need a lasso to catch one or practice your trick roping.


I used lots of pop dots on this project so I hope it gets to Utah in one piece.  Thanks for checking out my post and sharing this project with me.  I hope you will leave me some blog love!  Until next time...

Smooches!


Thursday, July 7, 2011

4th of July Bunco Decor

Hi everyone!  It's been a while since I have posted.  I decided to take a break over the holiday while I spent time with my family and also prepared for the Bunco Party I hosted on the 5th. 

I have seen so many great decorations on the Circle Blog and on all the MBs that I had to make some for my Bunco party to make it special.  Here is what I made!


Here are the carts and materials I used.

Carts and Materials
  • Shall We Dance - Hat
  • Cindy Loo - exclamation marks on the hat
  • George and Basic Shapes - Stars
  • From my Stash - various buttons, twine, doillies, and paper
Notice that I did not mention the Stand and Salute Cartridge.  That's because I don't have it.  So how did I make the hat???

I found a hat on my G that I liked.  I then put some exclamation marks inside the hat to make the cutouts (I hid the dots).  I then made a second hat without cutouts for the background.  I cut out some blue stars seperately and added them to the hat with popdots.  I think it came out great!

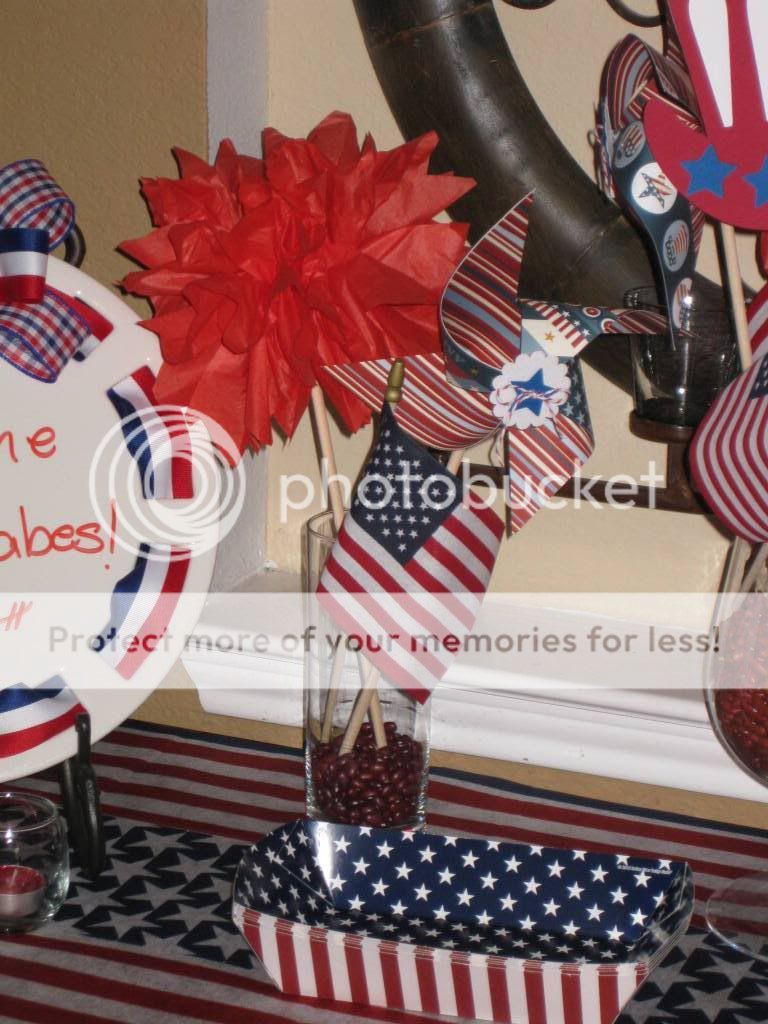
I also made some pinwheels in small and large sizes.  These are very easy to make since I didn't have the Mother's Day bouquet cart either.  Once I pulled my corners together on the large one, I put a doily and 2 stars in the middle.  I finished it off with a button with postmail twine running through it.

The small ones were a bit more simple with a scalloped circle punched out of white glitter paper in the middle.  I then placed a star that had a contrasting twine bow glued to the middle of it on the circle. 

The red tissue paper bursts of color are what I call my "fireworks".  Don't they look like the fireworks once they have exploded in the sky?  I made these by folding 3 sheets of tissue back and forth like you are making a fan.  Snip the ends in a V for a decorative edge.  Next I stapled the fan in the middle and then spread the sheets of tissue paper apart.  Last, I hot glued some dowels in the middle so I was able to put them in the jar with the other stuff.

You can make multiples of everything so you can place them all around the room to carry the theme to everywhere your guest will be.  I even put a few in the bathroom!

Lastly, I welcomed my guests with a Southern Living plate that I ran holiday ribbon through.  I finished the plate off with a bow and a cute sentiment. 

I hope you get some inspiration from this project and make some cut decorations for your next gathering.  Until next time...

Smooches!

Tuesday, March 15, 2011

I'm gettin' ready for a stampede! Cricut Stampede that is!!!!

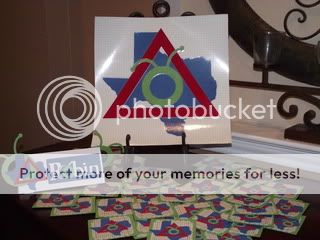
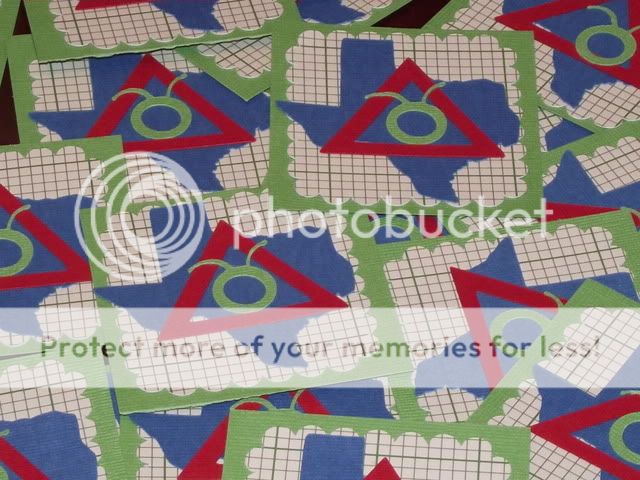
My Spring Break has started off well!  I just returned from a trip to Atlanta.  Now I am back and in full swing preparing for the Cricut Stampede this weekend.  Cricut Circle members make calling cards to trade at swarms.  I designed mine a couple of weeks ago and finally collected all the papers, cut everything out and put them together.

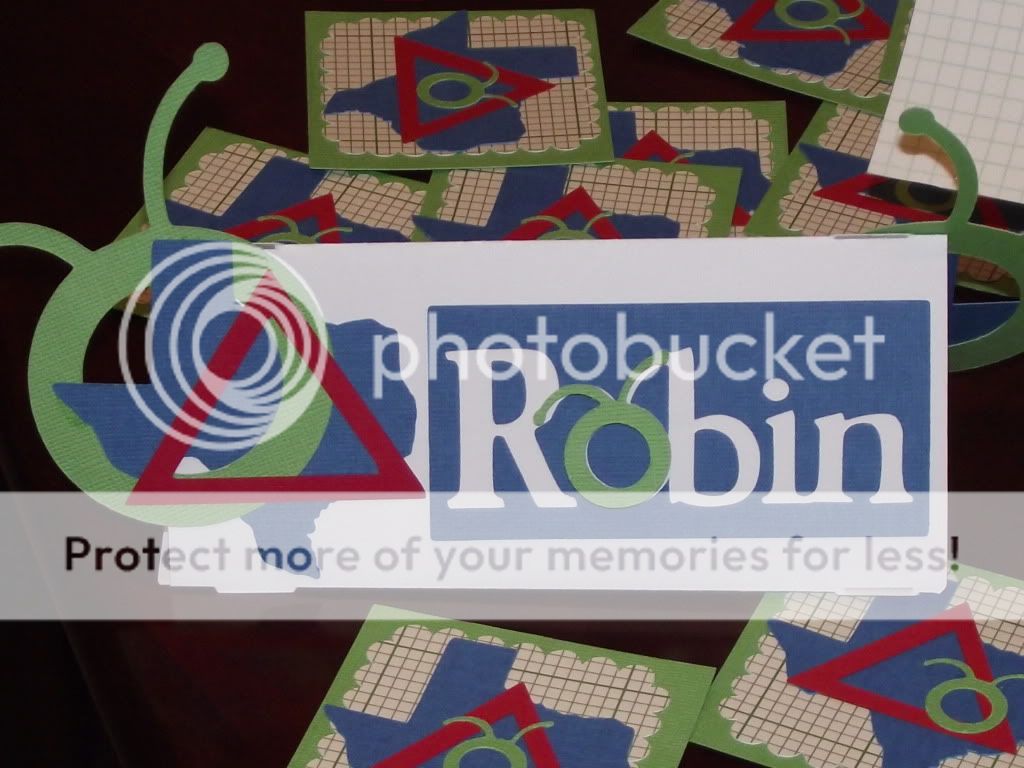
But I knew I wouldn't, or rather couldn't, stop there.  I decided to make a name plate and a placemat for my table at the swarm.  Here are the details.

Carts:
  • Everyday Cricut (Circle Exclusive) - circle bug head, name plate base, "o" in Robin
  • 50 States - Texas
  • Sugar and Spice Lite - scaalloped square
  • George and Basic Shape - triangles
  • Base Camp - Name
Calling Card
Since my MB name and blog name is Delta Scrapper, I had to include that in my design in some kind of way.  So I created a delta symbol by layering two triangles, one slightly smaller than the other, on my Gypsy to make the symbol.  I also wanted to add a feminine base so I cut some scalloped squares to lay on top of the 3x3 base.  I added a small Texas and bug head to finish the design.

Here's a trick to make sure everything fits - I put a 3x3 square on my Gypsy to use as my card base template.  I then tested all the layers on this template to "see" how the card would look assembled.

Nameplate

I love the Cricut Everyday cart!  I was thumbing through the book when I saw the name plate.  I new I had to make one of these for my table at the Stampede.  I pretty much continued my theme from the calling cards on to this project.  I modified the card base a little by hiding the slits that would have held the blue card in place and making the bug head bigger.  I also slid the bug head around the Texas so it could hug it.  I then layered the delta on top and glued it on the edge of the card. 


I welded the letters of my name together on my Gypsy (it is 2 different fonts) and layered a green bug head on top of the white one.

Placemat


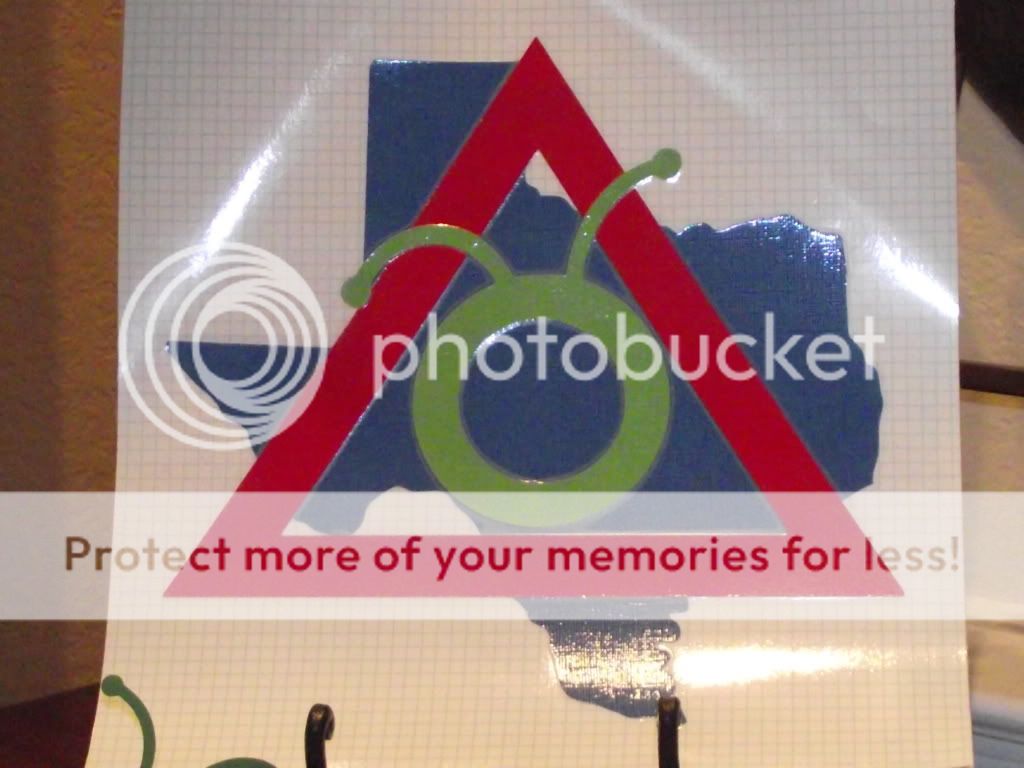
Everything is bigger in Texas!  So I made a bigger version of all the elements in my projects for a placemat.  I laminated it so any glue or ink won't stick to it. 
I can't wait to display these items on my table at the Stampede.  Look for me and my goodies!!!  Later Crafty People!!!!!
Smooches,

Friday, November 26, 2010

Thanksgiving Journal 2010

Hi everyone! I sincerely hope that everyone had a wonderful Thanksgiving filled with family, food and fun.

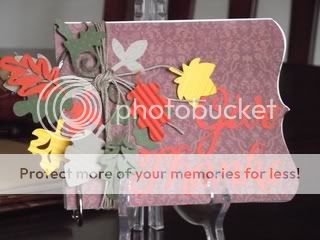
I saw a post on the Cricut MB of a journal that for Thanksgiving. In the journal, all of your family and guests would write what they are thankful for. I thought this was a great idea and that I would make one for us. Here is what I came up with.

This was my first time making a complete mini album - cover and all. I am so pleased with how this came out.
Here are the details!

Carts
  • Thanksgiving - cover and pages, title, some of the leaves, hat and turkey
  • George - holes in the cover and pages
  • Gypsy Wanderings - leaves
  • Create a Critter - leaf
  • B is for Boy - leaves
I used my G to layout all the cuts I wanted to make. I searched for "leaf" and found several cuts that would work for my design. I layed them out on my G and made the cuts.

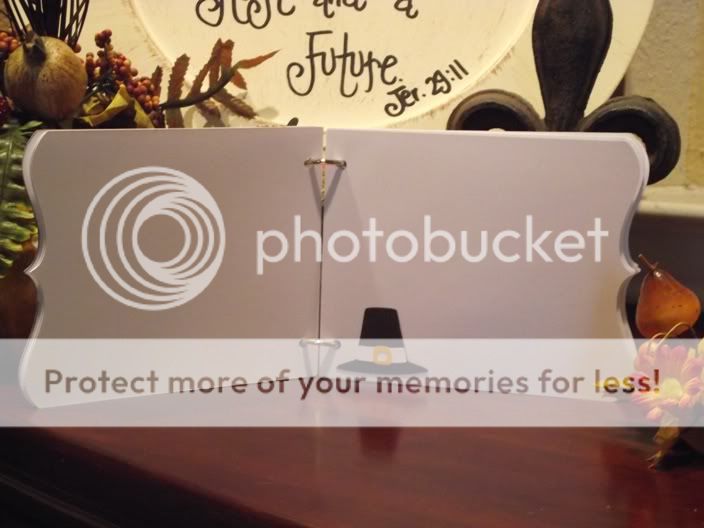
I used the card on the Thanksgiving cart for my cover and pages. Once I realized that I could use the same layout for the cover and pages, I was off and running. I put small circles on the card for the holes and removed the score marks. I cut the cover out of chipboard (an old ceral box) and cut the pages out of 12x12 cardstock.

Once all the pieces were cut out, I wanted to give the leaves more texture. So I ran some of them through my crimper and others through my wood grain embossing folder from Tim Holtz (I really love that one!). I glued the title on the cover, knowing that I would need room for the jute and leaves. I took some jute that I had gotten in the jewelry department and cut 6 lengths. I tied them around the top cover and tied a knot. I put the leaves from the Thanksgiving cart that were connected in the middle and tied the knot again. I then hot glued the leaves to the end of the jute and kinda let them float free.

I took the other cuts from the Thanksgiving cart and glued them randomly on the pages inside the book. These are the pages that I asked everyone to write on.

The other pages that are empty will be the pages that I put pictures from the day on. I will bring this out next year to show everyone and have a new one for everone to write in. I think I just started a new tradition for us! Thanks for looking!

Friday, September 17, 2010

It's an Infestation!!! Card

When I jumped back into crafting earlier this year, I was surprised about where my inspiration for cards, layouts and projects come from. I would be out somewhere and say "That would make an awesome card/layout" or "I can make that project!". Of course I would use my E and G to make these things, affectionatly known as Peaches and Herb.

So goes this card. I walked into Joann's and was stopped in my tracks by all the new MS Halloween Crafts. I love Martha's style and her creations never cease to amaze me. She has some bat cutouts that you can stick on the wall for Halloween. When I looked at the package, I said
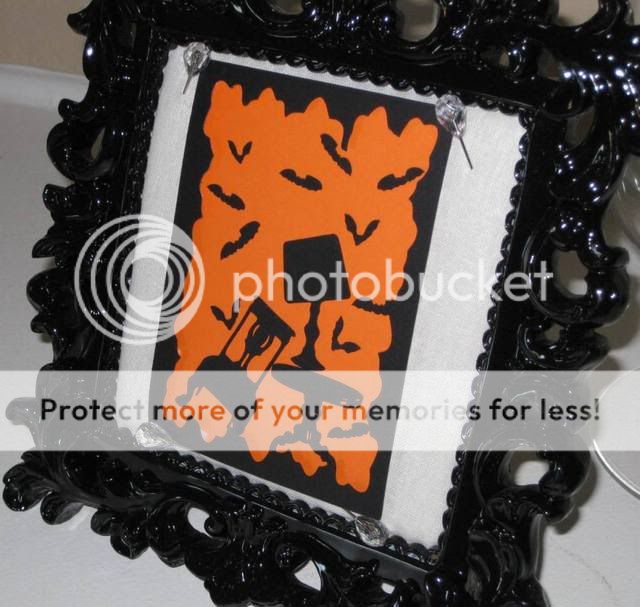
"That's my next card". And here it is! This card looks simple but there are actually 5 carts and some welding at work here. Here are the details:

Cartridges:
  • Happy Hauntings - bats
  • French Manor - chair, table and lamp base (which is actually the birdbath)
  • George - lampshade (which is a trapezoid)
  • MS Elegant Cake Art - jagged frame
  • Base Camp - rectangle (for plain frame)

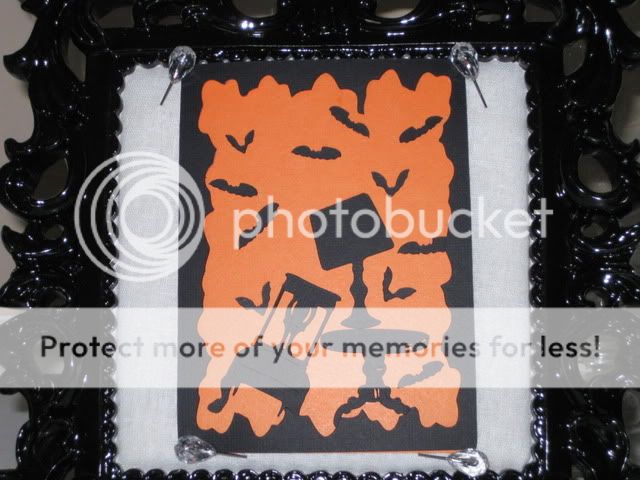
I started this card by making the frame on my Gypsy. I made a rectangle that was 4x5.5" and set the jagged frame inside it. When cut out, this made a nice frame for the card.

Next, I made the lamp. I know there are lamps on some carts but I didn't have one on the carts I own. So I made one. I took the birdbath from French Manor and a trapezoid from George and welded them together to make the lamp. I really liked doing it this way so I could tilt the lampshade like it has been hit by the bats.

I wanted a table and chairs that looked like they were in the hallway of a house. So I went to the Cricut Circle French Manor cart and chose the perfect cuts. I glued the chair on sideways to again, imply that the bats have taken over.

Lastly, I cut out lots and lots of the 2 kinds of bats from Haunted House. I glued them on the card in various places so it looks like an infestation.

I put small pop-dots on the back of the frame to lift it up and give a shadow effect. I love doing that on Halloween cards. I put it on the card and it was done. I love this card and I hope you do too! Leave me some blog love!


Smooches,

Robin
The Scrappin' Delta Diva

Friday, September 10, 2010

Beware!!!!!

If you have been watching the news, you probably have seen or heard about the tornadoes we had in the Dallas area this week. Lots of destruction but no lives taken (thank God!).

After the storm on Wednesday, I made this card. I only wish I had made it earlier so I could have showed it to the storm. Maybe that would have scared it away and left our city in tact. : P

Here are the details:

Cartridges

  • Happy Hauntings - tree, bats, sentiment
  • Mini Monsters - fence
  • George - moon (circle)

I cut a piece of purple cardstock at 4" x 5.5". I inked the edges with my TH Black Soot Distressing ink. I really like the gradual affect this technique gave the paper. I glued the tree to the background.

I inked the moon with TH Vintage Photo Distress Ink and it gave it a real ominous feel. I put an extra thick popdot on the back of the moon so it could cast a great shadow. I glued the up-winged bat on it and put it on the background. I thought the sentiment beware needed something after I put it on. So I covered it with Glossy Accent to make it shine. I glued down the last bat and that part was finished.

I took the smalled foam stickers that I had and cut them in half so that I could put them behind the fence. It worked just like I wanted so that fence cast a shadow, too. All put together, I really like this card. And I hope you do too! Thanks for looking!!!!

Smooches,

Robin
The Scrappin' Delta Diva