Saturday, February 16, 2013

Valentines Day Buckets

I made a couple of Valentines Day Buckets for some of my favorite little people!  Here they are.


Materials
  • Carts - Love Struck, Robotz
  • Jaded Blossom Stamps - Valentines Treat
  • Papers - Basic Gray "Shine On" for the robots; my stash for the V-Day Love
  • Action Wobbles on the lids
  • Punch - Martha Stewart
  • My Stash - ribbons, bling, twine

Here's the bucket for my God daughter.  I call this one V-Day Love.


Love Note on the lid.

The love note is on an action wobble.  I love these things!


Here is the bucket I made for my God Son.


Closeup of the girl robot.

Closeup of the boy robot.

On the lid, I put a robot who is in search of his true love.

 The robot is on a action wobble as he moves up the hill.
 
I hope you like my buckets.  My God children did.  They were so proud to take them to school.  Please leave me some blog love and tell me what you think of my buckets.  Talk to you soon!  until next time...
 
Smooches!
 
Robin


Tuesday, January 29, 2013

Tagapalooza - Birthday and Valentine Style

Hey Divas!  I'm back with 3 tags I made - 2 for birthday and 1 for Valentine's Day.  Here they are!


Materials and Cartridges
  • Party Hat and 6 - Birthday Bash Cartridge
  • Latice Tag - French Manor Cartridge
  • 8- Letter Envy Cartridge
  • Butterfly - Paper Trimmings Cartridge
  • Ink - SU Pink Passion and Whisper White
  • Valentine's Paper - "Sweet Love" by Little Yellow Bicycle
  • Happiness Birthday Stamp - Jaded Blossom "Sweet Birthday Wishes" collection
  • Stash - everything else

Here's aValentine's Day Tag I made with a collection of papers I just love.  Isn't it cute?!

What's a tag without a little bling on it?!  I added some bling on the doily I used for the background.  I layered on a fabric tag that I added a gingham bow to.  I love all the pinks and reds.


The collection include a bunch of Journaling Tags.  So I included one of those on the tag.  I added a row of TH rose ribbon on top of that with more bling in it.  It finished off the tag nicely.

Here's a tag I made for an 8 year old.  I wanted to make a butterfly taking light because I think that's exactly what she is doing.  

I used the Martha Stewart Coarse Glitter on the 8 and the buttergly to make it sparkle.  I stamped the sentiment on a little flag.  So cute!

The butterfly is 3-dimensional with it's wings standing up.  It really turned out nice and makes a great statement on the tag.

This tag is for my gorgeous God-daughter, Layla.  She was turned 6 this month.  So I made this tag for her gift bag.  

I made these tags at a crop with my crafty friends.  She had some of the new January release stamps from Jaded Blossom, including the Sweet Birthday Wishes set.  I used it at the top where I also placed a bow made from seam binding and some bling.

My sweet God-daughter is very stylish.  She loves anima print so I included that on her tag.  I then took it over the top with the bling in the shape of the 6.  I added more bling on the hat to top the whole tag off.  I edged the cream base with the pink ink to bring that finish to the tag.

I am very happy with all 3 tags.  If you like my creations, leave me some blog love and let me know.  Thanks so much everyone!  Until next time...


Smooches!!


Robin

Monday, January 14, 2013

Cards of Inspiration

Hello Divas!  How have you been?  I am feeling very blessed today because 100 years ago today, my sorority, Delta Sigma Theta, was founded by 22 courageous young women.  I am inspired by their vision and will do my best to carry it on.

Speaking of inspiration, that's what this project is all about.  One day, I went looking for a stamp of my favorite scripture, Hebrews 11:1.  I came across a company called Verve Stamps.  They have a line of inspriational stamps, as well as many others kinds of stamps.  I ordered a few since they are very reasonably priced, and I have to say that I love them!  They are really great quality and their customer service is awesome.  Check out their website by clicking here.

Here are the 4 different cards I made with just a few of my stamps.


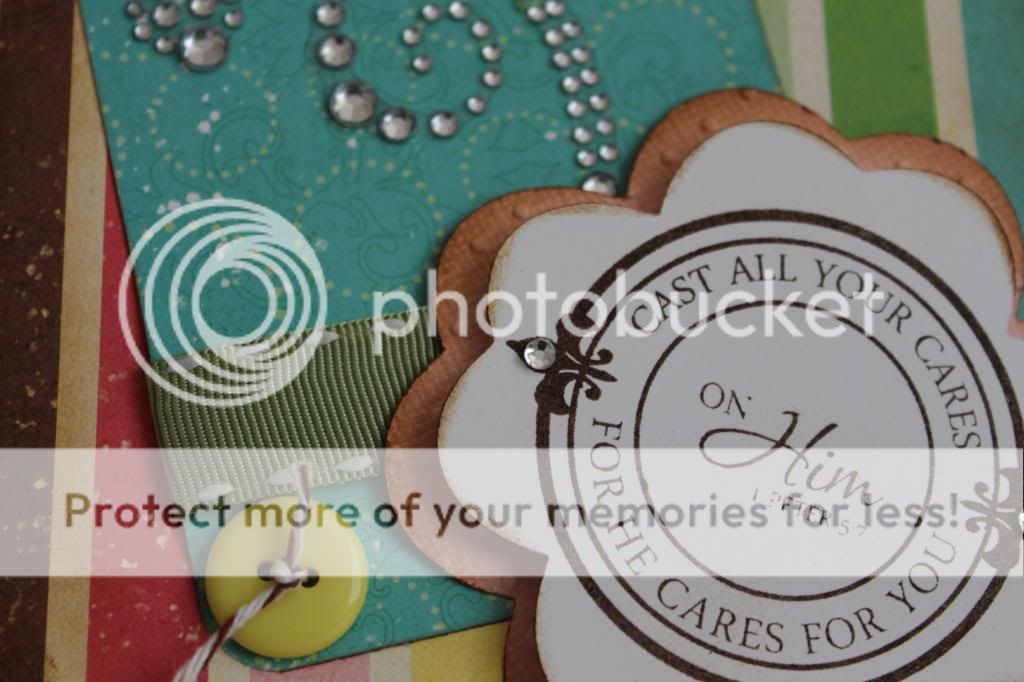
Here are the materials I used for the Cast Your Cares On Him cards
  • Paper - Echo Park "Life Is Good"
  • Ink - SU Chocolate Chip and TH Vintage Photo
  • Pearls - Recollection
  • Bling, Lace, Buttons and Ribbon - my stash
  • Panels - Storybook Cartridge
  • Embossing Folder - Swiss Dots
 
I really love the colors of these cards.  They are all so soft but vibrant at the same time.  
 
 
It was a last miniute decision to add the bling to the card.  I don't see how it would have been complete without it now. 


The background panel of the panel was embossed and inked.  Although the embossing may have seemed to be lost, it's one of those discoveries that you find after you keep looking at the card.  The inking helps you find it.


This card is a little more simple and structured.  I think I will make the panel larger the next time.


The pearls and the lace add a dimension of nostalgia to the card.  It works with this paper collection.


Here are the materials I used for the Faith Is... and I Can Do All Things... cards
  • Paper, Fibers and Stickers - Basic Grey "Ambrosia"
  • Ink - SU (Basic Gray and Pumpkin Pie) and TH (Spiced Marmalade and Black Soot)
  • Panels - Base Camp and Storybook Cartridges
  • Punch - MS Punch Double Loops
 
This paper collection is a little harder in it's colors.  But the marterials soften them.

 
The orange cross in the back was a freebie stamp for placing my order.  I stamped the scripture on top in gray.  I love the way it all came together with the inking and fibers.


I love this paper!  I reminds me of the Orient and their love of intricate details.  
 
 
I took several fibers from the collection and intertwinded them together.  I like the way they criss-cross across the border I punched with one of my MS punches.
 
 
I love these cards and can't wait to write a sweet note to somone in them.  I hope they have inspired you as much as they have warmed my heart.  Until next time...
 
 
Smooches!
 
 
Robin

Thursday, January 3, 2013

Etched Glass For Christmas! Pic Heavy

Hey there peeps!  I finally got up the nerve to try something I have always been wanteing to do - etched glass.  I have always been intimidated by process.  It just seemed so daunting and hard to do.  I decided to give it a go this holiday season. Here's my first project.

Here's what I used!
  • Etching Cream
  • Q-tips
  • MS Elegant Cake Art Cartridge
  • Calligraphy Collection Cartridge
  • Vinyl
  • Various Glass objects -  glasses, wine glasses, dishes

For the Pyrex dish, I wanted to etch the back of the dish.  So I designed my wording on my Gypsy and flipped the image so it cut backwards.  This made the sticky side on the top of my vinyl.  I stuck it to the bottom of my dish and pressed down so all the edges sealed real well.

IMPORTANT!!!- When you select your design, make sure you put a box around the design so you can make a good template.  This box helps keep a safe border of vinyl between your etching cream and the rest of your glass object. 


Using the Q-tip, layer the etching cream inside the vinyle with your design cut out of it. 


Once 5-10 minutes have passed, wash the remaining cream off with warm water and soap.  Before you do, you can scrap the cream off and put it back in the container.  This will help your cream last longer.  Tada!!!! You are done!

When I went to the store to buy the materials, the clerk told me that once I started, I would be addicted.  Man was she right!  Soon I was thinking of all kinds of things to do.  I decided to make some glasses of all different kinds for Christmas gifts.  Here are some pics of what I made.


I hope you enjoyed seeing my projects and mostly, I hope this post inspires you to make something with glass etching.  Until next time...

Smooches!

Robin

Wednesday, December 26, 2012

Secret Santa Christmas Mini Album - Pic Heavy

Hello Peeps!  Merry Christmas!!  I wanted to share a mini album I made this holiday season.  I am a member of a group on Facebook called Crafty Girl.  My talented friend and founder, Jennifer Flatt, decided to do a Secret Santa with group members.  I was a Secret Santa to Ema Martinez, whose talents with Copics make me drool!  Anyway, on her list of things she likes was mini albums.  I didn't need to ready any further because I knew what I was going to make for her.  Here is my creation.

I used all sorts of items from my stash.  But here is the best account I could put together of the various materials I used.
  • Paper - Anna Griffin's Calisto Christmas Paper Pack
  • Glimmer Mist - Gumdrop
  • Tim Holtz Inks - Fired Brick, Pine Needle and Vintage Photo
  • Tim Hotz Pins and Charms
  • Cricut Cartridges for Ornaments - Paper Trimmings and Christmas 
  • Cinch Machine and Coiled Binding Wire
  • My Stash - doily, flowers. leaves, fibers, tags, buttons, stamps, mini clothes pin

 
Here's a closeup of the cover.  I used a doily that I spritzed with Glimmer Mist for my base and then started to pile on the goodies from there.  I am pleased with the way it came togehter.  It looks camera ready! : )

Let's get inside to the pages.
Even though this was going to be a mini album, I wanted to put a lot of real estate in it for Ema to put her pictures from the season. So I decided to make the pages fold out pages.


Page 2 - this page has an ornament I cut from the Paper Trimmings cartridge.  I added a gold button for the finishing accent.


Page 3- This page got a pocket for a vintage tag to collect all those memories.  These kinds of spaces will become important in years to come when you look back at this mini.

Page 4- I put an orment on this page that was cut from the Christmas cartridge.  I left the right side loose so a picture could be slid under it.


Page 5- Another tag to jot down the feelings of the season.  The older I get, the more important these things are.  The spirit and the feelings are what make the moments special!


Page 6- Another cute little tag for memories to be kept.  I left space for a picture as well.


That's it for this mini.  I think Ema loved it from what she said on her post.  I certainly enjoyed making it for her.  Until next time...

Smooches!

Robin

Monday, November 26, 2012

Turkey Toss Basket 2012

Hi everyone!  I have been crafting this Fall quite a bit.  But as usual, my crafts go out to others and many times I have forgotten to take pictures.  But this time I didn't.

I am fortunate to work at a school who values everyone's contribution to making the school a success.  Each year at Thanksgiving, different departments are assigned a custodian to make a Turkey Toss Basket for.  We bring traditional Thanksgiving food items and anything else we want to make our basket the best of the competition.  For my department, I volunteer my crafty services to put our basket togther.  Here is a picture of my creation this year.


Here's how I put the basket together.  I bought a large utility tub from Lowes.  I cut the word "Drinks" out of outdoor vinyl in maroon and gold which are our school colors.  I used my Cricut and the Martha Stewart Elegant Cake Art Cartridge for the fonts and to cut the vinyl.


Once I applied the vinyl (this was my first time double layering vinyl - I need some more practice! : ), I stuffed the bottom of the tub with newspaper to build it up.  I then laid a piece of orange burlap on top of the newspaper.  Then, I layered in the food and household items.  I took a plush fall garland and wrapped it around the rim of the basket. 


To take our basket to the next level and keep the whole family involved, I made a "Bucket of Fun" for the kids.  It included some coloring books, a few toys and supplies to make Thanksgiving cupcakes.  I decorated the bucket with text messages and speech bubbles from the Smiley Cards Cartridge.  I then cut "bucket of fun" from the Martha Stewart Elegant Cart Art Cartridge.


UPDATE:  I just wanted everyone to know that we did indeed win the contest!  I really do have an awesome team that I work with.  Yeah us!!!!

Thanks everyone for checking out my post.  Leave me some blog love and until next time...

Smooches!


Robin