Hi everybody! Guess what I found on my doorstep today? A FedEx box from Jana Eubank with my Hello Wednesday prize in it! I wasn't even expecting it for a couple of weeks. I like when I get good surprises in the mail.
For those of you that don't remember, I won the new Cuttlebug All-In-One Embossing Folder and Thank You Embossing Set on the Circle Blog. It was just released at CHA and it looks like a fun new toy. There were lots of people on the MBs that wanted to know how it works so I made a video of my set. I hope you like it!

Monday, February 28, 2011
Monday, February 21, 2011
I won! I won!!!!!
I am so excited because I won a prize on the Cricut Circle Blog!!!! Take a look.

And here is what I won - the new Cuttlebug Embossing set from PC that is not even on the market yet! I can't wait to get my hands on this!
 Look for some projects using this set soon!
Smooches,
Robin

And here is what I won - the new Cuttlebug Embossing set from PC that is not even on the market yet! I can't wait to get my hands on this!

Smooches,
Robin
Thursday, February 17, 2011
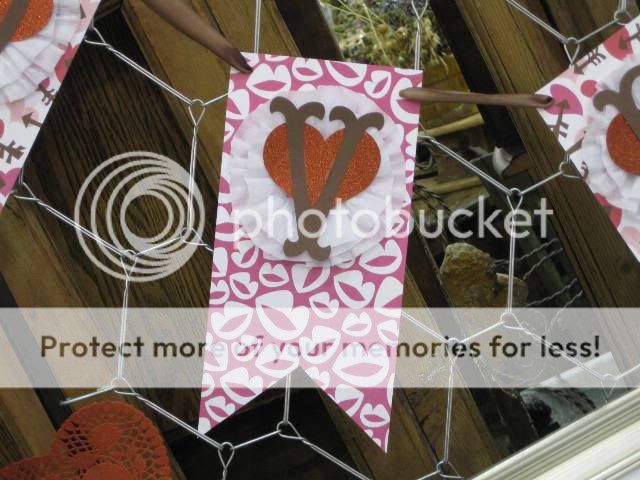
Valentine's Day Banner
I am really like making banners. Who knew! I made this one for my store and it was so cute. A customer even offered to buy it from us. It was really simple to make. I cut a 12x12 piece of paper in half and then cut a triangle out of it on one side. I made a double layered rosette with crepe paper and cut a heart out of red glitter paper. I cut the word "LOVE" with the Storybook cart out of brown cardstock and ran a piece of brown ribbon to hold it all together. I think it is very cute! Here are some pics of the banner.


Let me know what you think. Later ladies!
Smooches,
Robin
Tuesday, February 15, 2011
Hubby's Valentine's Day Card
 My husband loves the cards I make for him on his birthday, Christmas and especially Valentine's Day. This year's card was not a disappointment. He couldn't stop looking at it! He kept commenting about how much he liked it and I'm sharing it with you.
Here are the details:
Carts
- Sweethearts - hearts, couple, Love
- Base Camp - old school
Before I glued any of the cuts on, I stamped the card with a stamp from Unity Stamp. It has the definitions of love, loving, enjoy and other sweet words. I used the Real Red ink pad from Stampin' Up.


I wanted the give the "L" in love a little zing. So I took a strip of bling and curved it around the loopy (techincal term there) part. I really like the effect!

The last think I did was add a couple of Prima flowers and an intricuate heart with a bling brad. That added the final touch to a beautiful card. Leave me some love and I'll see you next time!
Smooches.
Robin
Monday, February 14, 2011
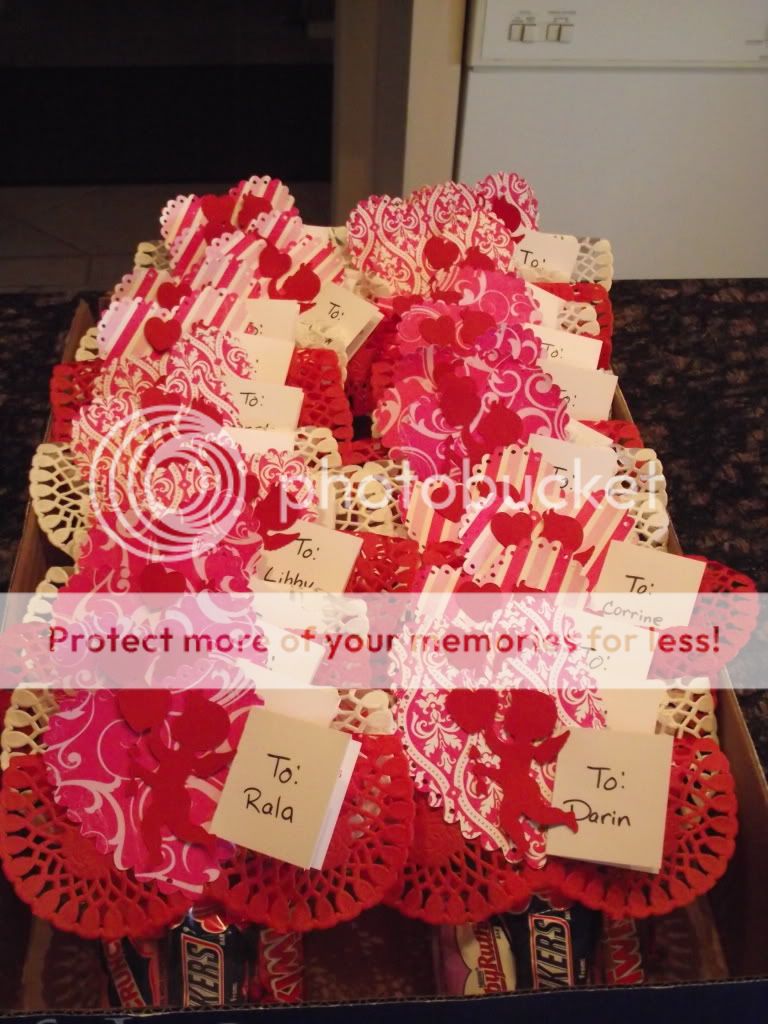
Valentine's Goodie Bags for Co-Workers
Hi everyone. I love Valentine's Day! Call me a hopeless romantic but there isn't much I don't like about this day. I especially like to make things for my family and friends. I made these V-day goodie bags for my co-workers and some of my special students. I put some candy in a cello bag and stapled a heart shaped doilie on the top. I then cut a heart and cupid from the Sweethearts cart and glued them on top of the doilie.
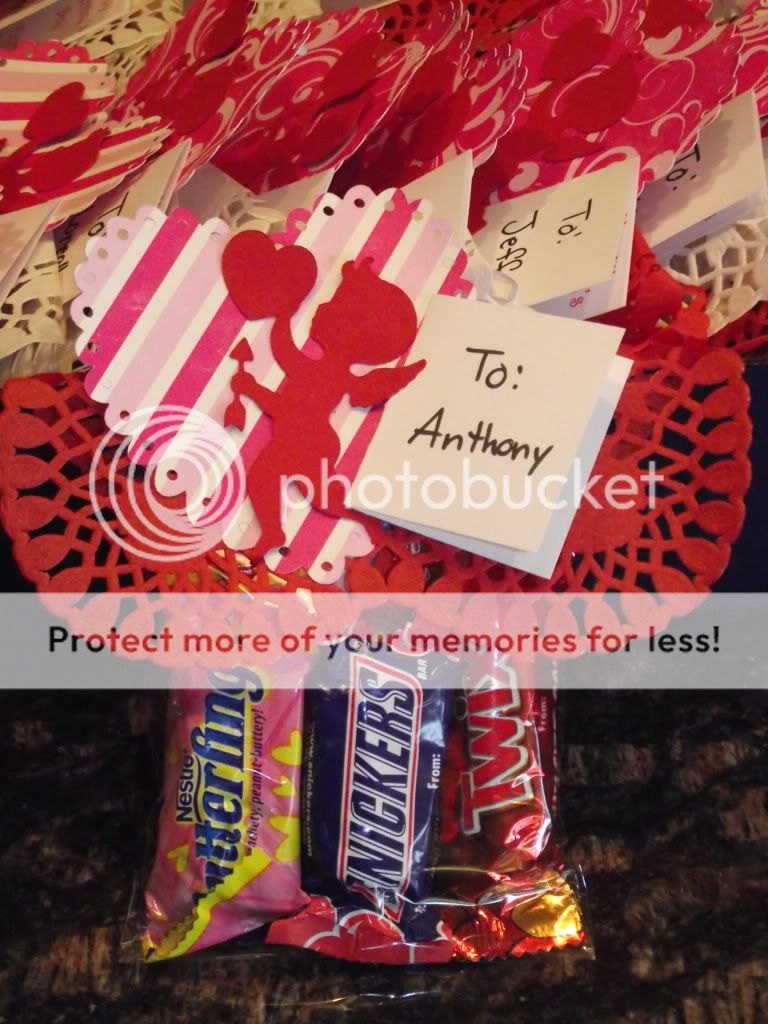
I made the little cards by using a business card template in Microsoft Word. I put a Text Box on one side of the card template and typed in it. I then folded that in half with the words on the inside and made small card. I wrote the name on the outside to personalize each bag.

I made 26 bags in all. They were a hit!
I hope you like them. Leave me some love and I'll talk to you all soon!
Smooches,
Robin
Friday, February 4, 2011
Signs of the Season Mini Album (Pic Heavy)
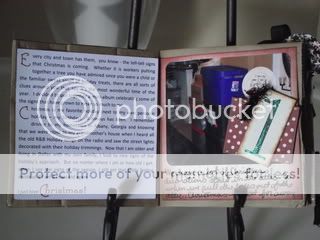
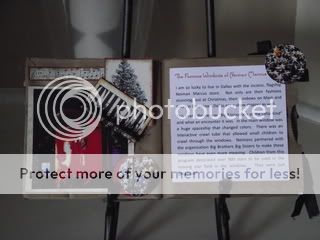
Hi guys! There are always things that I look for (and  things that trigger me) to let me know that Christmas is on it's way. These signs make my spirits perk up and are the things that get me in the mood for the holiday. So this year, I decided to do a mini album dedicated to these signs. I used the amazing Noel collection from Teresa Collins. These papers are so beautiful and very well coordinated. I did not get all the pieces I wanted in the collection but I did get some good ones. One sheet has the numbers 1-25 on it that could be used for a countdown. I used that sheet to number the things I was listing. All the sheets are double sided so you feel like you get more for the money. Plus her designs are just fabulous. I can't wait for her cartridge to come out. I'll be first in line!!!
Here are the pages of my mini and the details!
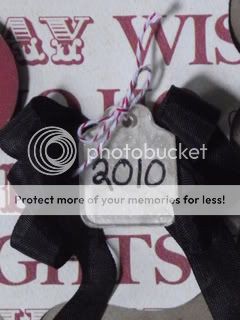
The Cover - I used the Holly Jolly cart for the ornament on the cover (cut in shadow). I also used the Storybook Cart for the background piece (Accent Blackout option, 1st column, 5th row, hide the holes) . I printed the title on the computer, cut it out and glued it on the ornament. I also hand wrote the year on a piece of the paper from the collection and glued it to the back of a TH fragment with Glossy Accents. I tied a piece of red and white twine to the fragment and backed it with some black seam binding. I also inked the edges to make the cover stand out more.
Thanks for looking and I hope you like my work! Leave me some blog love to let me know. Thanks!!!!
things that trigger me) to let me know that Christmas is on it's way. These signs make my spirits perk up and are the things that get me in the mood for the holiday. So this year, I decided to do a mini album dedicated to these signs. I used the amazing Noel collection from Teresa Collins. These papers are so beautiful and very well coordinated. I did not get all the pieces I wanted in the collection but I did get some good ones. One sheet has the numbers 1-25 on it that could be used for a countdown. I used that sheet to number the things I was listing. All the sheets are double sided so you feel like you get more for the money. Plus her designs are just fabulous. I can't wait for her cartridge to come out. I'll be first in line!!!Here are the pages of my mini and the details!
The Cover - I used the Holly Jolly cart for the ornament on the cover (cut in shadow). I also used the Storybook Cart for the background piece (Accent Blackout option, 1st column, 5th row, hide the holes) . I printed the title on the computer, cut it out and glued it on the ornament. I also hand wrote the year on a piece of the paper from the collection and glued it to the back of a TH fragment with Glossy Accents. I tied a piece of red and white twine to the fragment and backed it with some black seam binding. I also inked the edges to make the cover stand out more.

Page 1


Page 2


Page 3

Page 4


Page 5 
Page 6

Thanks for looking and I hope you like my work! Leave me some blog love to let me know. Thanks!!!!
Smooches,
Robin
Thursday, February 3, 2011
Valentine's Day Cards!
S ome of you know that I own an invitation, stationery and gifts business called The Chic Paperie. I really love working in my business with my mom and helping keep the beauty of paper alive in this technological world (not to mention that I can mix in my hobby with my business!).
And I did just that for Valentine's Day. I created these limited edition cards to sell in my suite. I used a couple of carts on the cards, made some embellishments myself and used some punches too. I really love the way they all came out!
Here are the details on each card!
The Gamble - on this card, I layered a piece of paper from the Love collection by American Crafts. I cut the pink heart with the Freshly Picked cart and glued some red seam binding I got on Etsy to the back. I created the Bingo card on my computer using Microsoft Excel. I also printed the sentiment, cut them out, rounded the corner and inked the edges.
Happy Valentines Day - for this card, I started with a piece of paper from the Love collection by American Crafts. This paper is double sided and I used the plain side instead of the decorated side. I then layered a smaller piece of tiny heart paper and then a heart I cut from the Gypsy Wandering cart. I covered that heart with some pink seam binding and put a heart button in the middle. I stamped the sentiment with a $1 stamp, cut it out and put some pop dots on it to give it a little lift. Simple and adorable!
Rosette Love - these papers are from the Love collection by American Crafts, too, but to me they have a little more masculine feel. I layered a piece on the card and rounded the corners. I used a new valetine punch set from Martha Stewart called Heart Chain on a thin piece of red card stock. I attached that to a complimentary piece of paper from the collection that I cut in an 1 1/2" side strip. I then cut another strip 1 1/2" x 12" to make the rosette. I scored it every 1/2 inch for the folds and glued the ends together. One of the papers in the collection was full of valentine icons so we cut some out and glued them in the middle of the rosette. We added a heart pin for a special touch.
Amore - These papers are from the Be Mine collection by Echo Park. I glued a piece to the card base and then added a strip of pink cardstock for accent. I cut the Eifel Tower from the Summer in Paris Cart and layered it on 2 Prima flowers that I sprayed with Perfect Pearls Mists in Perfect Pearl. I attached them all together with a bling brad and glued them to the card. I then glued the sentiment on and it was done!
I love all the cards we made and I hope you do too. Leave me some blog love and I'll talk to you later!
Smooches.
Robin
ome of you know that I own an invitation, stationery and gifts business called The Chic Paperie. I really love working in my business with my mom and helping keep the beauty of paper alive in this technological world (not to mention that I can mix in my hobby with my business!).And I did just that for Valentine's Day. I created these limited edition cards to sell in my suite. I used a couple of carts on the cards, made some embellishments myself and used some punches too. I really love the way they all came out!
Here are the details on each card!
The Gamble - on this card, I layered a piece of paper from the Love collection by American Crafts. I cut the pink heart with the Freshly Picked cart and glued some red seam binding I got on Etsy to the back. I created the Bingo card on my computer using Microsoft Excel. I also printed the sentiment, cut them out, rounded the corner and inked the edges.

Happy Valentines Day - for this card, I started with a piece of paper from the Love collection by American Crafts. This paper is double sided and I used the plain side instead of the decorated side. I then layered a smaller piece of tiny heart paper and then a heart I cut from the Gypsy Wandering cart. I covered that heart with some pink seam binding and put a heart button in the middle. I stamped the sentiment with a $1 stamp, cut it out and put some pop dots on it to give it a little lift. Simple and adorable!
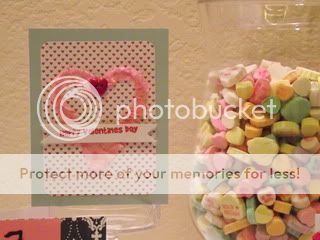
Rosette Love - these papers are from the Love collection by American Crafts, too, but to me they have a little more masculine feel. I layered a piece on the card and rounded the corners. I used a new valetine punch set from Martha Stewart called Heart Chain on a thin piece of red card stock. I attached that to a complimentary piece of paper from the collection that I cut in an 1 1/2" side strip. I then cut another strip 1 1/2" x 12" to make the rosette. I scored it every 1/2 inch for the folds and glued the ends together. One of the papers in the collection was full of valentine icons so we cut some out and glued them in the middle of the rosette. We added a heart pin for a special touch.

Amore - These papers are from the Be Mine collection by Echo Park. I glued a piece to the card base and then added a strip of pink cardstock for accent. I cut the Eifel Tower from the Summer in Paris Cart and layered it on 2 Prima flowers that I sprayed with Perfect Pearls Mists in Perfect Pearl. I attached them all together with a bling brad and glued them to the card. I then glued the sentiment on and it was done!

I love all the cards we made and I hope you do too. Leave me some blog love and I'll talk to you later!
Smooches.
Robin
Subscribe to:
Posts (Atom)