Monday, June 28, 2010

Diva Shoe Box

Hi everybody! As I have said before, I do more than scrapbooking and card making. I have always been into crafts and this project took me back to my roots. My anniversary is on my mother's birthday. They were both this past Saturday, June 26th. My mother (who has an extrodinary number of pairs of shoes!) had a birthday brunch called "Heels that Heal". She asked everyone to bring 2 pairs of shoes to donate to a women's shelter thrift store where she used to volunteer.
So in honor of her obsession and the party, I made this "Shoe Box" for her. There were lots of goodies inside like a journal and a set of 3X3 notecards that I made or altered. Here are the details.


Carts
  • Summer in Paris - shoes
  • Plantin Schoolbook - flowers
  • Mini Monograms - scalloped circles on the lid
First I painted the box black with a regular glossy black craft paint. I didn't waste paint on the are I knew would be covered with paper. When it was dry, I wrapped 6X24 band of paper around it (its 2 - 6X12 pieces that I connected). I punched the edges first to give it a little frilly look.

I cut small shadows of the shoes and glued them on the white band. I embellished them with some bling and they were done. I printed some "Made in..." tags on my computer and glued them on the box.

For the lid, I cut two scalopped circles, one smaller than the other and glued them on the lid. I wanted the large shoe I cut out of glitter paper to stand up so I made a "kickstand"out of a strip of black paper, glued it to the shoe and then stuck it to the lid. I covered up the attachment with 3-layer flowers held together with a brad.


The Journal - I buy things in the $1 bin all the time that I can alter and make personalized gifts. My mother had mentioned that she wanted to start back journaling so I decided to make her one to get her started. It was already black so I covered the cover with a piece of red paper. I then cut out a smaller matching shoe and glued it one. I had a few extra flowers so I attached those and called it done.


3X3 Notecards - I like to have a few little cards around when I am in a pinch. I thought this was a perfect opportunity to give my mom some infused with a little whit. I googled some quotes with the "shoe" in them, typed them up on the computer, printed and cut them out. I did plan the cards out on the paper so that when I cut the card out, the quote was in the center. I made it 6 1/2 X 3 so that I could have a 1/2" fold over to keep the card closed. I punched out some scalopped circles with my SU! punch and added yet more shoes and bling. I made 6 total and banded them together. I saved the file so I could make more when she needs them.


Tips
  • When attaching anything to the painted surface of the box, I used Terrificly Tacky Tape. I needed something that would really hold.
  • I discovered a website called http://www.quotesdaddy.com/. They have all kinds of quotes, some you can use in cards or anything else you need a quote for.

Thanks so much for looking. Leave me some blog love!


Smooches,


Friday, June 25, 2010

Thanks a Latte Card


Hi again! I have been working on some more cards and other projects this week and I am pleased to share them with you. Here is a card I call "Thanks a Latte"! (In case you didn't know, I love coffee!). I really like this card because it is big enough to slide a gift card in to Starbuck's or your local coffee house. Here are the details!

Cartridges:
Gypsy Wanderings - cup
Mini Monogram - Thanks and words on cup (thanks was an image option)
Base Camp - U Rock
Tags, Bags, Boxes and More - Tag

I cut out the two cups I welded together (I used the shadow of the cup) for the base of the card. I inked the edges of the card with my SU! Pretty in Pink ink pad. I then cut out a smaller shadow in brown as well. I ran it through my Sizzix Texture Boutique with the Swirls embossing folder from Cuttlebug to add some dimension. I had to cut the handle of the mug off to make it fit in the folder.
I also cut out the word "Thanks" and made the rest of the wording from the same font to match it. I glued it on the embossed brown paper.

I took the tag I cut out and inked the edges as well. I glued the welded "U Rock" to the tag and ran a piece of brown and pink ribbon through it. Tied the ribbon on the handle and the card was complete. I love it!


Thanks for looking and let me know what you think!
Smooches,


Robin

The Scrappin' Delta Diva

Sunday, June 20, 2010

Bridal Shower Dress Card

Hi everyone! I saw this dress card with paper lace made from a border punch on the Cricut Messageboards and I just had to try it. I really love the way it came out. I had a little snafoo on the left side but I will have to fix that for the next time. And since it is wedding season, I am sure this card will come in handy. Here are the details.

The entire crad was made form the Gypsy Wanderings cart!

The dress template actually came from the Gypsy A to Z video from Above Rubies Studio (thanks so much!). It was made from the shadow function. I did have to make some adjustments to the design and I think I will make a few more in the future.

The sash on the dress is an accessory to the dress image. Size it to make it fit your card. Shower is one of the phrases on the cart and it has the shadow to go with it as well.

Now, for the lace! I used the Arch Lattice border punch from Martha Stewart. I am sure you could probably use a wide selection of border punches but this was the one I chose. Through trial and error, I found a couple of ways to make cutting the lace easy and fast.

1. Cut several 3/4 inch wide pieces of paper (it really depends on the size of your punch design. You may need to increase it but this size works for the average punch). This size of paper gives you a little strip of paper at the top where you can apply your adhesive. The length is up to you - just make sure it extends past the longest part of the dress.

2. Place the piece of paper under the punch so that you don't see the edge of the paper on one side. This is important.

3. Move the paper to the left (for right handed people). I like the MS punches because there is a little guide of the deisgn that helps me line the paper up straight and continue the design.

4. Continue to punch along until you reach the end of the strip. When you finish, you should have two strips of paper - one with the lace edge and one that is just a strip. By starting with the end of paper under the punch, it allows you to completely sever the extra little strip of paper and you don't have to cut it. This saves you a step. See the picture below for examples of the process.


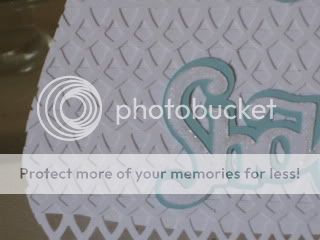
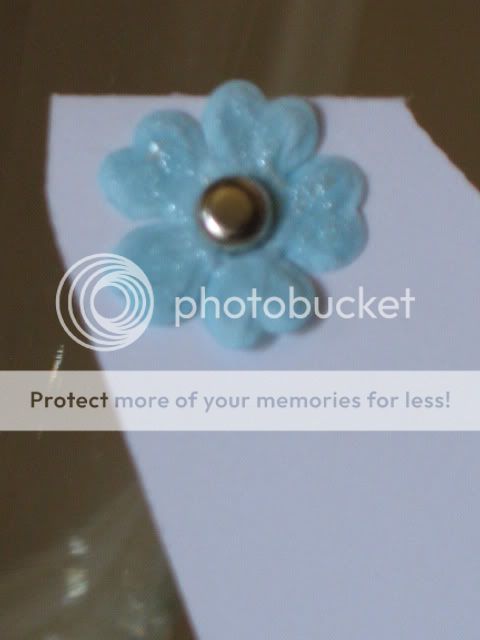
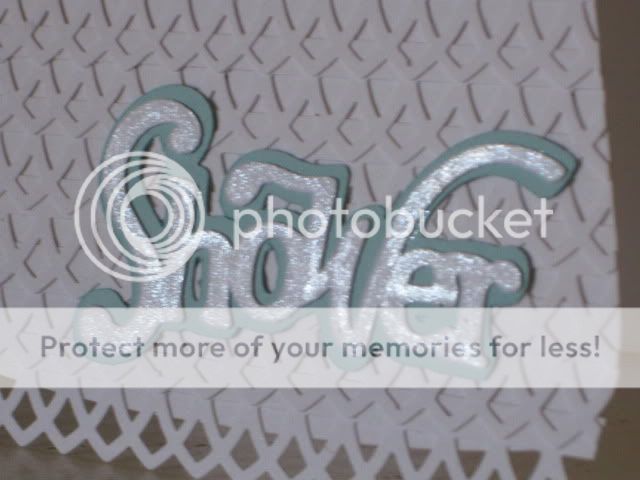
When I cut out the word "Shower", I felt like it needed a little zing! So I added someting called Smooch Peralized Top Coat in the color Illuminate. It's like fingernail polish for paper. I also brushed it on the flower I added on the shoulder, put a tiny silver brad in it and attached it to the dress. Voila! It was done and I really like the way it came together.


Tips

  • Start laying your lace from the bottom of the dress. This way you can lay your next piece on top of the last one so that it looks layered
  • Lay the lace on the dress with a little extra hanging over the edge.
  • Use your precision scissors to trim the edges of the lace to follow the edge of the dress. Don't use an exacto knife. This is how I ended up with my little snafoo on the left side

I hope you like the card. Please leave me some blog love and TFL!!!!


Smooches,

Robin
The Scrappin' Delta Diva

Thursday, June 17, 2010

Chipboard is everywhere!

So as I am finding out more and more of what my Cricut and my G can do, I am learning all kinds of great recylcing tips too! I have the deep cut blade and recently learned about using cereal boxes for chipboard. What a great way to reuse this box!

So I wanted to ask you: Where do you get your chipboard from? I got a package in the mail and realized that the envelope (FedEx, DHL, etc.) was made from chipboard. I would love to hear about what else I could recycle and save myself some money at the same time (that's more that I could spend on carts!). Please share!!

Smooches,

Robin
The Scrappin' Delta Diva

Monday, June 14, 2010

Thinking of You Card using stamping

Hey everybody! It's me again. For those of us who have been scrapping for a while, we know that it usually spills over into other things - crafting, stamping, painting, etc. Well, my scrapping lead to stamping, my second passion. I usually get my stamps and supplies from Stampin' Up! My rep is awesome (Hey Elisa!) and I love their products.

A recent order from Stampin' Up! was the inspiration for this card. I bought a stampin' wheel they had on sale called So Swirly. When it arrived, I dipped it in my basic gray ink, rolled it out and fell in love. Why did I wait so long to get this product?! This particular wheel has a very whispy and feminine feel so I dug through my other stamps to find something complimentary. This manequin stamp fit the bill. It's not SU but I love it still. The sentiment "Thinking of You" is a SU stamp. I think the addition of the ribbon finishes the look. Thanks for looking and I'd love to read your comments!


Hey Cupcake Card

Hey everybody! Happy Birthday to ME! Yesterday was my birthday and I had a great day!

Here is this week's project. It's a card I titled "Hey Cupcake". I was cruising through some of my carts on my Gypsy (you all know how much I love her) and the cupcake icon on the Celebrations cart caught my eye. I thought it would be cute on a card with this sentiment. So I started designing and this is the result. I learned a lot along the way and here are the details.


Cartridges:
Celebrations - cupcake layers and shadow; green matting
All Mixed Up - word "cupcake" and shadow
Opposites Attract - word "hey" and shadow

While I was making this card, I learned something about the cupcake. When you cut the cupcake and the layers, it leaves a space between the frosting and the cupcake wrapper. I didn't realize this when I was laying it out so I had to go back and cut a brown layer for the cake part of the cupcake. Note to self: Look closer at the images! ; )

Something else I realized is that even though my G said my matting was 3.85" x 5.25", it was actually only 3.5" wide. I don't know why this happened but I ended up having the cut the white card so it wouldn't look akward. If you can shed some light on this for me, I would greatly appreciate it!

That's all for today. As always, thanks for looking and please leave comments!

Wednesday, June 9, 2010

My First Tri-fold Card

Do you ever get big ideas when you have the smallest amount of time to accomplish them? Well, that happens to me all the time. It might as well be the story of my life. But I do it to myself so I have no one else to blame.

So goes the story of this card! I found myself in need of 2 cards and 2 hours to make them. That's design, select papers, cut and assemble. I don't know about you, but that is alot for me! The first card went quickly. But this card, my second card, not so easily. I found out just how hard it is to make cards for guys. I remembered that I had the trifold card cut file from Makeupgirl 217 (thanks lady!). That got me started but then I had to fill the panels. I picked some images but wasn't quite sure how it was going to come out. I was pleasantly surprised when I assembled it at how nice it looked.


Here are the details (all images were sized to fit the panel):
Celebrations - celebrate, balloon and candle border (I used 3 pieces that I welded together)
Beyond Birthdays - happy birthday and star
Mini Monogram - Pilar (his name)
Thanks for looking and I would love to hear your comments!
Robin
Scrappin' Delta Diva

Tuesday, June 8, 2010

Cricut Lite Cart

So after trips to 3 different Wally Worlds, I finally found a Cricut Lite Cart. Luckily, it was the one I wanted right away, Sugar and Spice. I was very shocked that they weren't at my regular WW which is less than a mile from where the very first Recollections was (man I miss that store!). There are lots of scrappers and Cricut users around here. I had to go about 20 miles away to find the one I purchased.

Then I get home, try to sync it and it doesn't work! I hop on the boards and find out that the update for the new lite carts for the Gypsy is not out yet. PC, don't play with us like that! You need to get your timing down better. Supposedly, it will be out in a week or so. After the last update debacle, I am not holding my breath. I guess I will just have to look at my new cart fondly from a distance and play with it in a week. Until then...

I Started a Blog for my Scrappin' and Craftin'!

As if I don't have enough to do, I took the suggestion of Jeannie Phillips (love her stuff) and started a blog for my cards, layouts and crafts. Many of you may not know that I am a Special Education teacher and I own my own stationery, invitation and gift store. I have a website, blog and Facebook page that I personally manager for that. So starting this blog is just a further step into insanity for me!

But I love all things paper! And since I have aquired my G (I love her! How did I live with out her?), I feel like I have elevated from crafter to designer. Who knew that was in me?! Thanks to my G, I now know it was and is.

So here I go, creating, designing and crafting anything that has uses paper. I do scraplift and I am not ashamed to admit ;)! But I will always give credit where credit is due. I come up with my own stuff, too, and this will be the place to see it all. Thanks for visiting and here we go on a crazy ride, all devoted to my love, I mean obsession, with paper!